Contents
Have another version? ILINX version 9.5, ILINX version 9.1, ILINX version 9.0, ILINX version 8.6, ILINX version 8.5, and ILINX version 8.0, Older versions are included only in the installation package.
About
ILINX Capture & Intelligent Workflow enables organizations to define and manage processes in a composable, nimble, and adaptable manner. Any business process can be defined in a no-code GUI – giving you total control from start to finish. ILINX Capture & Intelligent Workflow gives you the ability to process data through multiple outlets including scanning, file-importing, e-forms, mobile, and much more. With this product, you are guaranteed a configurable process from start to completion making information accessible at every stage.
Please see the ILINX Capture Administrator Guide for information on administering the system.
Accessing
Logging In
Step 1: Have your Administrator provide you with a URL for logging into ILINX Capture.
Step 2: From an internet browser window, enter the ILINX Capture URL as provided by your Administrator.
Note: The URL is not case-sensitive; Microsoft Internet Explorer is the only web browser that supports the XAML Browser Applications used by ILINX
Step 3: Click the Sign in with an ILINX built-in account account button to open the Sign in to ILINX menu. If your Server has Entra ID enabled, click on the Sign in with an Entra ID button to log in with Entra ID.
Step 4: Enter your User name and Password provided by the Administrator.
Note: The username is not case-sensitive; the password is case-sensitive
Step 5: Click on the Login button. Check the Remember me checkbox if you want the system to remember your login credentials for the next login.
Once logged in, the Assigned Work tab will be selected.
Key Terms
This section is used to define the key terms that are used within ILINX Capture & Intelligent Workflow, and will be important to understand when utilizing this application:
- Batch – A batch is a collection of one or more documents, pages, and associated index values that flow through a workflow process as a single unit, ultimately delivered to a repository.
- Document – A document is a collection of pages/files and index values that are stored inside of batches. Document types have their own set of index fields and multiple doc types can exist within a batch.
- Pages – Pages are the names of files once they have been inserted into a batch or document.
- Loose Pages – Loose pages are pages that do not reside inside of a document, only the batch. Index fields cannot be applied to loose pages until they are put into a document.
The Capture Tab
The Capture tab is where users can upload files into ILINX Capture for processing and storage using multiple functions (e.g. scanning or importing electronic documents). If scanning, selecting the Scan option will find any attached TWAIN or WIA-supported scanners. This includes any scanner with a Kofax VRS installation. The File Import option can be used to import any document on the network into the Capture tab.
When the capture tab is selected, a history section will appear at the bottom of the display. Instructions for How to submit documents are found on the display screen above the history; history is based on the user session and will be lost upon logout.
Note: Administrators can change the instructions to follow a specific business process
Note: The maximum recommended batch size is 500MB, not to exceed 250 B/W pages
The steps include the following; each will be described in depth later in this section:
Step 1: Capture – drag-and-drop from the desktop into the left panel or right-click on the file cabinet.
Step 2: New doc – select one or more items to organize.
Step 3: Index – Enter keywords to make the item searchable.
Step 4: Submit – Clicking this button submits the documents for later retrieval and viewing using the index values associated with the document.

Capture panel
The Capture panel is where users can add files to ILINX Capture for storage and processing. Business processes will determine specific configurations and permissions for how documents are configured for an organization. Actions are displayed by right-clicking on the file cabinet, document, or page icons, or by selecting an icon and using a keyboard shortcut. This panel can also be collapsed/expanded by double-clicking on or dragging the slider bar.
Display panel
The Display panel displays images of acquired documents. Documents appear in this panel when the thumbnail image is selected in the Capture panel. ILINX Capture & Intelligent Workflow can capture several different document file types. Common file types include TIFF, PDF, and JPEG files. Depending on the file type of the document, there are different features available within the display panel and the context menu.
The Context menu will appear by right-clicking on an image in the Display panel. As mentioned in the previous section, different Context menu options will appear depending on the file type of the document you are looking at. Some Context menu options include:
- Printing the selected page.
- Adding annotations.
- Deleting the selected page.
- Changing how the document appears in the window.
Note: Depending on how your Administrator created the workflow profile, your screen may resemble the image above, having two panels (the Display panel and the Capture panel with the option to toggle to the indexing panel) or it may display three panels where the Thumbnail and Index panels are side by side along with the Viewer panel
How to Capture Documents
Documents are uploaded to ILINX Capture & Intelligent Workflow through scanning or file import options in the context menu of the Capture panel. Remember that all options might be used when creating a batch of documents. You may also choose to generate searchable PDF files in ILINX Capture. This option is available in the Set scanner settings dialog. The PDF – Image Only, and PDF – Searchable options in the scanner settings dialogue will determine PDF searches.
In the Capture panel, you will see an action button displayed at certain times. Use this to directly access options rather than right-clicking/selecting. Hover the mouse on this button for tooltips and available options.
Begin the capture process by right-clicking on the file cabinet icon. This will open a context-sensitive menu with several sub-menus as pictured below.

The first menu contains the following options:
- Device options – Set the default scanner for this batch.
- Scan – Capture physical files using a scanner.
- File import – Capture digital files that are stored on an accessible system.
- Change type – Change the workflow profile for the currently selected batch.
Note: If you have already entered index values, changing the workflow profile will likely reset that information. However, if the originally selected workflow profile and the new workflow profile have identical document type names, index field names, and index field types, any index information you have entered will carry over to the new workflow profile
- Delete – Delete the current batch.
- Index – Open the indexing panel.
- Submit – Submit the batch into the selected profile’s workflow.
Note: This option will not be available until the batch contains documents and any required index fields have been filled
- Go to page – Navigate to a specific page of the batch.
Hovering over the scan or file import options will open a sub-menu. These menus contain options for specifying how the capture process should organize the documents.
- New doc – All pages captured will be organized into one document of the selected application.
- New single page doc – Each page captured will be organized into individual documents, one per page, of the selected workflow profile.
- Unclassified doc – All pages captured will display as loose pages and will be organized/classified to any application post-capture.
- Save to file – The batch will be stored in a designated location on the local file system.
Note: See more on this option in the other topics section of this guide
Capture Panel
The Capture Panel is the left section of the Capture tab that displays multiple icons that are used to identify the batch, documents, and files that are active in the current Capture instance.
Icons & Buttons
The following is a list of the icons and buttons within the Capture panel and what they represent:
- File cabinet icon – The current batch resides within the File cabinet icon. Right-clicking this icon will open the batch context menu options.

- Document icon – The Document container. Right-clicking the document icon will open the document context menu options.
- Page icon – Thumbnail of a page: identified with position number, dpi of image, and file size.
- New batch button – Selecting this button lets you scan or import a new batch.
- Submit button – Applies the index values selected and stores the documents for later retrieval and viewing by their assigned index values.
Note: The submit button is unavailable until all documents with required indexes are entered, and no loose pages exist
Working in Capture Panel
To select multiple pages or documents, shift-click and ctrl-click the desired pages or documents.
Note: The submit button is unavailable until all documents with required indexes are entered, and no loose pages exist
- Drag pages to re-arrange as necessary, or to move from loose status to a document.
- Click and drag the right-hand border of the capture panel to resize it. The thumbnails will automatically be arranged into columns so that you can view more of them at once.
 Indexing the Batch
- Navigation buttons display at the top of the indexing screen.
- Required index fields will display with a red-bordered field until a value is entered, as well as a permanent red asterisk.
- If the index field name is underlined, it is the key value associated with a database lookup.
- A drop-down button appears where a field value has an associated picklist.
- Clicking on the pin value checkbox will apply the value you entered to all subsequent documents in the batch, or until the checkbox is unselected.
- Click the action button to return to thumbnails.
- Optionally, you can select multiple documents within a batch by holding down the Ctrl key and clicking on the documents you want, allowing entry or modification of all of their indexes simultaneously. This will change
- Select the index document option and modify it appropriately.
- Use the Tab key to easily move the cursor down the index fields. If you are in a table-type index field, you can move the cursor out of its fields to the next index field with Ctrl + Enter.
Using Drag & Drop Option
When capturing electronic documents, the option to use simply drag and drop into the Capture panel is available. This can be used in conjunction with an existing batch or used exclusively as the manner of capture.
- If the batch has no documents in it, all files added to the Capture panel will be added as loose pages.
- If a file is dropped onto a document icon, the new pages are inserted at the beginning of the existing document.
- If a file is dropped onto a page in the document, the new pages are inserted below the dropped-on page.
Batch Status Panel 
- Displays all workflow profiles (containing content) that the current user has permission to see.
- Displays a count of items being processed by the server.
- Displays a count of items in an error state.
- Displays a count of items currently being worked.
- Ability to collapse/expand this pane by clicking on and dragging the separation bar.
Advanced Search
- Exposes the advanced search option that allows the user to search for a specific batch.
- Search metadata values include batch name, work queue, confirmation code, date created, and created by.
Search Results Panel
- Displays list of items in selected workflow profile, error state, or processing queues.
Workflow profiles
- The workflow profiles will be displayed in alphabetical order.
- From the list of items, select the batch to work by double-clicking or right-clicking the batch. The batch will open in a new Work Item tab.
- Only one workflow profile can be selected at a time.
Document Display Panel
When working on items or indexing documents, the document(s) appear in the document display panel. With the focus on the opened document, index fields can be reviewed and modified, annotations can be applied, and discussions can be added/monitored.
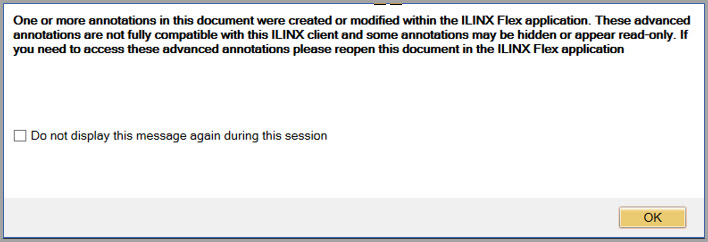
Note: If annotations were utilized in ILINX Flex, they may be hidden or may not be viewed properly in ILINX Capture. If this is an issue, the message below will display when the document is opened. See the ILINX Flex documentation here for a list of annotations only available in ILINX Flex
Work Item Tabs
- Each currently opened batch will have a corresponding tab.
Index Fields/Thumbnail Panel
- Click the arrow to toggle between the Index and Thumbnail view.
- Click the Next button to go to the next document in the batch if multiple documents are in the batch.
- Click Submit to submit the batch to the next step in the workflow.
- Use the Tab and Enter keys to move the cursor between index fields without clicking.
When Workflow Profiles are linked to an ILINX Content Store application, the Thumbnail panel will have similar check-out/check-in functionality that is available within ILINX Content Store Search results.
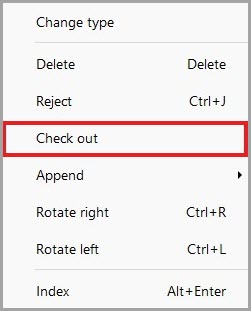
Right-clicking on the Document folder in the Thumbnail panel will open the context menu displaying the Check out option.
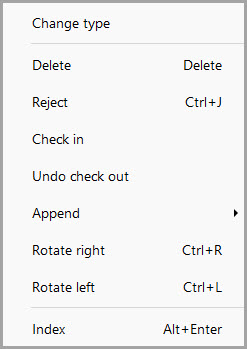
The context menu will change to include the Check in and Undo check out options. Selecting Check in will open a message box to allow the user to add a note to the comments.
Note: If the user tries to submit a batch that has one or more documents checked out, an error message will display and stop the submission process. Submitting is only successful if there are no checked-out documents
Document Viewer Panel
- Window where the selected document is displayed.
Context Menu
- Right-click on the image to display available options.
- (Optional) – If the Workflow Profile is linked to an ILINX Content Store application, the context menu will include an option to Add Stamp annotations. These Text Stamp annotations are configured within the ILINX Content Store and may be used within the ILINX Capture Document Viewer panel.
Note: If an administrator turned on the approve or reject modes in the HumanActivity IXM permissions, you will see an approve button and a reject button instead of the submit button

Index Fields Panel
- When a field is modified, the save option will become active and selectable by ‘right-clicking’ the tab. Once save is selected, the index fields will be updated, and the document will remain in the window display.
- If metadata is removed from a required field, a red box will display around that field, and the Submit button will not be active until data is entered into the field.
- By clicking the next button, the user is taken to the next document in the batch.
- By clicking the back button, the user is taken to the previous document in the batch.
- After completing indexing for all documents, the user can click the Submit button to move the batch to the next queue in the workflow.
- Click the display batch fields link to display the batch fields associated with the batch.
For non-image file formats (e.g., MS Office DOC, XLS, and PPT) the document will display inside of the display panel, using its native application browser plug-in. The context menu will change to maintain the same functionality as it has in the native program.
Note: For file formats where browser plug-ins are not available, the files will launch in their locally installed native application outside of the display panel
For shortcut options in the Document Display Panel, refer to the Document Display Context Menu Shortcuts guide.
Comments
The comments panel is a mechanism for discussion of a particular batch. This panel and function can be accessed by selecting the # comments button at the bottom of the Document Viewer panel.
- A comment entry can have up to 1,000 characters. A visual of the number of characters will appear next to the discussion box as the text is entered.
- The comment area can be collapsed/expanded by the user as desired.
- Choose to sort comment entries by most recent or oldest.
- When a comment is added to a thread, the user’s name and the date entered are attached.
- Once saved, a comment cannot be removed, and previously entered comments cannot be modified.
- Users can filter comments using the dropdown – Sort All, System, or Users comments.

The Report Tab
The Report Tab allows a user who has the appropriate permissions to see all of the batch activity within a specified workflow profile.
This tab lists reports for every workflow profile that has a configured workflow. You can filter what reports are displayed with the following on-screen options. You can also print, email, and download a workflow profile report from this screen.
Batch Status & Productivity

- Workflow profile – Choose which workflow profile’s report you want to see from this drop-down list.
- Date created – Select an operator from the drop-down list and then choose a date by typing in the date field or clicking on the calendar icon.
- User productivity – Choose a user profile from this drop-down list to view that user’s submission activity for the selected workflow profile.
- Items in the queue longer than – Filter the reported items by the number of hours or days spent waiting to complete their workflows.
Concurrent Users

- Date Range – Enter the From & To date range to report concurrent user activity.
- Reporting group – Select the user group you want to report concurrent users in.
- Add – Select the Add button to add new groups to the list of users to select from in the dropdown for Reporting Group.
- Edit – Select the Edit button to modify the groups in the list of users to select from in the dropdown for Reporting Group.
- Date Range – Enter the From & To date range to report concurrent user activity.
- Transaction Type – Select the type of transaction the batch has been submitted from.
- Capture Mobile submissions – This option will count all transactions submitted using the ILINX Capture Mobile Application.
- Public eForms submissions – This option will count all transactions submitted using a publicly deployed ILINX eForms batch.
Assigned Work Tab
The Assigned work tab is used to access items and documents within ILINX Capture that are assigned to a given user. Provided you have the appropriate permissions, you can view readouts of the completed and ongoing batch activity within your workflow profiles. The tab provides a set of parameters for filtering the items it returns including a detailed Advanced search option.
This tab is the default entry point for all users. How the interface displays, and which panels are expanded are determined by the user rights given by the Administrator.
In the left-hand panel, you can select which workflow profile you wish to display from the Workflow profile drop-down list. You can also choose to display all the items currently in their workflow processes, all items that have encountered errors, or all items currently in use.
Note: These final three options return items across all Workflow profiles
Additionally, with the Work queue drop-down list, you can filter the results according to workflow activity. For example, you can select HumanActivity to display all items that currently require the completion of a HumanActivity IXM in their workflows.![]()
Clicking the Pin icon next to the refresh button in the left-hand panel allows you to Auto-hide the queue panel.
Finally, you can use the Sort by drop-down list to change the order in which the left-hand panel displays the resulting items. The center and right-hand panels will display the capture panel and the document display window as they are in the Capture tab.
Global Queues
Within the Assigned Work tab, the Workflow profile drop-down menu contains two kinds of queues: Workflow profile queues and Global Queues. Each Workflow profile has its own queue for active items. In addition to these queues, the global queues filter and display all items based on their status in the workflow. Each queue has its own context menu, which can be accessed by right-clicking on the batch.
All context menus have the following options in common:
- History: Shows a history of the batch as it has traveled through the workflow.
- Clear Selection: Clears all batch checkboxes you have checked.
The five queues are listed here, along with their unique context menu options in addition to the two mentioned above (if they have any additional):
Note: These context menu options are all subject to individual user permissions
- Processing: This queue contains all items that are currently being processed in the workflow, but that are not currently waiting in a HumanActivity queue. The Processing context menu has no unique context menu options.
- Errors: This queue contains all items that have stopped processing due to an error. The Error context menu has the following additional options:
- Restart from the last checkpoint: Restart the batch from the last checkpoint it successfully passed. The last checkpoint will be mentioned in the Error message.
- Restart from the beginning: Restart the batch from the beginning of the workflow.
- Delete: Deletes the batch from the queues.
- Email a link: If the recipient has proper permission to view this batch, you can send them a link to view it for approval or rejection.
- In-Use: This queue contains all batches currently in use (locked) by a user. The In-Use context menu has the following additional options:
- Unlock: This option unlocks the batch from the user that has it locked to.
- History: This option displays a history of the batch’s activity while processing.
- Add comment: This option allows the user to add a comment to the batch.
- Export index data: This option will export the index data to a CSV file that will be saved to your file system.
- Select all: This option will select all batches within the In Use queue.
- Clear selection: This option will close the open batch in the Document Display panel.
- Completed: After batches successfully exit their respective workflows, they can be accessed here. The Completed context menu has the following additional options:
- Restart from beginning: This option will restart the batch from the beginning of the workflow.
- Delete: This option deletes the batch from the ILINX Capture & Intelligent Workflow system.
- History: This option displays a history of the batch’s activity while processing.
- Export index data: This option will export the index data to a CSV file that will be saved to your file system.
- Clear selection: This option will close the open batch in the Document Display panel.
- Suspended: Depending on the permissions set within the HumanActivity the batch currently resides in, users can choose to suspend an active batch. This batch will not continue processing until this user has unsuspended the batch. The Suspended Context menu has the following additional options:
- Unsuspend: This option will remove the batch from the Suspended queue and continue processing it through the workflow.
- Email a link: If the recipient has proper permission to view this batch, you can send them a link to view it for approval or rejection.
- History: This option displays a history of the batch’s activity while processing.
- Export index data: This option will export the index data to a CSV file that will be saved to your file system.
- Select all: This option will select all batches within the In Use queue.
- Clear selection: This option will close the open batch in the Document Display panel.
When you right-click on an active batch in the queue for that profile in the Assigned Work tab, you have the following options (according to your user permissions):
 Approve: Submits the batch.
- Reject: Rejects the batch.
- Lock: Locks the batch, preventing editing by other users who do not have sufficient permissions.
- Lock to user: With the appropriate permissions, a user may be assigned or locked to another user.
Note: A user must log in to ILINX at least once to have a batch locked to them
- Suspend: Freezes the batch at this point in the workflow. The batch cannot continue through the workflow and is placed in the Suspended queue until the Unsuspend option is selected, either by the user who suspended it or by another user who has sufficient permissions.
- Delete: Deletes the batch.
- Email a Link: You can email a link to this batch to another user. This user must have sufficient permissions to view the batch.
- History: See a history of the batch’s progress through the workflow. Selecting will open a window that provides options to view All, System, or User comments related to the batch. Also, sort Oldest/Newest on top.
- Add comment: This option is available for single or multi-select operations. A window will open to prompt the user to enter comments that will be applied to all items selected.
- Update index fields: Opens a window to update Batch level index fields for the selected batch or items. If multiple items, they must be in the same workflow profile. Once updated, options to Save & Submit, Save & Close, or Cancel. Document index fields and Table index fields are not supported using this function.
- Export index data: Opens a window to choose a location to save the CSV file for the batch(es) selected.
- Clear Selection: Deselects all items that are currently selected.
Advanced Search
If you need to further filter the resulting items, you can use the Advanced search option. Click the binoculars icon near the top of the left-hand panel to open the search parameters window.

Set your desired search parameters, and then click Search. Clicking the clear here to add a new condition button will add another field that can be used to further filter the results. Clicking the Reset all search fields will clear any search fields that were changed to their default values.
Note: The search parameters you set do not change or reset on completion of a job. This allows you to retain the search group you are looking for without having to redo your search parameters
Assigned Views Tab
The Assigned Views tab is also used to access items and documents within ILINX Capture, however, specific queries are created by the Administrator which specify the content that is displayed and available for any user. These Views can vary widely based on the business needs of the organization.

The Assigned Views tab’s appearance is very similar to the Assigned Work tab. There are three panels, Work items, Index fields/Thumbnail, and Document Viewer panels.
Work Item Panel
- Select the View profile that the user has permission to from the dropdown list. Some configurations may load a message box, which requires the user to enter additional information to load the list of items.
- Use the Refresh button to reload the Views listed for the given profile.
- Select the Pin to auto-hide the panel.
- The list of items that are within the View query criteria is displayed.
Index Fields/Thumbnail Panel
- Click the arrow to toggle between the Index and Thumbnail view.
- Click the Next button to go to the next document in the batch if multiple documents are in the batch.
- Click Submit to submit the batch to the next step in the workflow.
- Use the Tab and Enter keys to move the cursor between index fields without clicking.
When Workflow Profiles are linked to a ILINX Content Store application, the Thumbnail panel will have similar check-out/check-in functionality that is available within ILINX Content Store Search results.
Right-clicking on the Document folder in the Thumbnail panel will open the context menu displaying the Check out option.
The context menu will change to include the Check in and Undo check out options. Selecting Check in will open a message box to allow the user to add a comment to the Comments tab.
Note: If the user tries to submit a batch that has one or more documents checked out, an error message will display and stop the submission process. Submitting is only successful if there are no checked-out documents
Document Viewer Panel
- Window where the selected document is displayed.
Other Topics
Scan to File Option
One of the options when capturing documents through scanning is Scan to File. With this, the operator can directly create an electronic document and save it to the local file system.
Step 1: From the scan option in the capture tab, choose scan to file. All captured pages are assembled into one document.
Step 2: Manipulate the document as needed.
Step 3: When ready to file, Index the document.
Step 4: Enter the required indexes.
Step 5: Give the document a name.
Step 6: Browse to an output folder.
Step 7: Choose to convert to XPS if desired, otherwise, the document will be saved in TIFF format.
Step 8: Choose to add date and time to the document.
Step 9: Click Submit to save the batch.
How to Use a Database Lookup
During the capture process, or when modifying indexes, the user can utilize a database lookup to help enter index fields. An index field is the trigger by which the lookup occurs.
Information retrieved by the lookup will display in a table view, allowing the user to select the row that will automatically fill in the selected index fields. The administrator will set this up to activate when the tab key is pressed or when a certain number of characters are entered.
- Enter a value in the lookup field (the index field name appears underlined).
- If multiple fields are found during the lookup, each will appear in a table for selection.
- More than one field might be designated as a lookup field. In this case, values can be entered in any of the lookup fields to begin the discovery.
- Lookup can be used after submission when reviewing/modifying a document’s index fields.
Device Options
When logging into an ILINX installation for the first time, the user will need to tell ILINX what scanning device to use. To do so, they proceed like they normally would with creating a new batch, but instead of choosing Scan in the resulting dialog, they will need to choose Device options -> Choose default scanner.

Selecting Choose default scanner will open the ‘Select source’ window that will list all the scanner drivers installed on that workstation. The user will select the driver that goes with the model of the scanner and click OK. From that point on, ILINX will remember which scanner to use for that user. If multiple users use the same workstation, each user will have to go through this step the first time they launch the new ILINX client.
Users may choose whether to display the scanner dialog before clicking capture. To enable/disable this option, Users click on the Show scanner dialog before scanning (or use the hotkey Ctrl + Q) to display a checkbox next to the option (check mark = enabled). If this is disabled, default scanner settings that are configured in the ILINX Workflow profile (if set) will be used.