Contents
Have another version? ILINX version 9.1, ILINX version 9.0, ILINX version 8.6, ILINX version 8.5, ILINX version 8.0, Older versions are included only in the installation package.
About
ILINX Flex, a key component of the ILINX ECM Platform, enables you to easily capture accurate information from a desktop, laptop, tablet, or smartphone.
This guide contains information on how to configure the ILINX Flex, Administrator tools, and options.
Note: This guide assumes that installation of the ILINX Capture Platform and the ILINX Web Platform products have taken place. For complete installation documentation, please see the ILINX Web Platforms Installation Guide
Configuring
See the ILINX Web Platforms Installation Guide for installation information and configurations. ILINX Flex utilizes configurations from ILINX Content Store, ILINX Capture, ILINX eForms, and ILINX Analytics. Each of these products may be configured to be used in ILINX Flex according to the license assigned.
Accessing
In addition to the primary ILINX Content Store client application, you can also access the product’s end-user capabilities from the ILINX Flex client application. The simplicity of this client application makes it perfectly suited for ad-hoc or casual users.
The ILINX Flex client application delivers many of the same capabilities as the primary client including:
> Global and advanced searching
> Full document management operations
> Document operations such as viewing, emailing, and downloading.
To access the ILINX Flex client application, perform the following steps:
Note: This client application supports a wide variety of web browsers running on either Windows or Mac, including Mozilla Firefox, Google Chrome, and Microsoft Edge
Step 1: From an Internet browser window, enter the ILINX Flex client URL. ILINX Flex does not support IE Mode in Microsoft Edge.
https://[ServerName]/ILINXFlex
The URL is not case-sensitive
Step 2: Enter a valid username and password.
The Username is not case-sensitive
The Password is case-sensitive
Step 3: Click on the Sign-in button.
Step 4: Once logged in, you will see a navigation panel on the left. The items listed in the navigation panel are dependent on the licensing, configurations, and permissions the user has.
Note: Selecting the Refresh button in browsers will return the user to this login screen. To avoid this, use the <F5> key. This applies to browsers Chrome, Firefox, and Edge
Document Viewer
The ILINX Flex Document Viewer allows users to capture documents for either ILINX Content Store applications or ILINX Capture batch profile workflows. The Flex viewer also allows users to view thumbnails, index items, and create and view comments. The Document Viewer is compatible with PDF documents, raster images, and MS Office documents including docx, xlsx, and pptx. The following table contains a list of supported file types in ILINX Flex:
Note: Configuring the viewerMaxPagesPerLoadedDoc in the Web.config file will control the maximum number of pages can be loaded in the viewer per document
|
SUPPORTED FORMAT
|
FILE TYPES
|
|---|---|
| OpenXML |
|
| Binary File Formats |
|
| OpenDocument Format |
|
| Text |
|
|
|
| Vector Images |
|
| HTML |
|
| CAD |
|
|
|
| PostScript |
|
| Raster Images |
|
Note: SSL offloading is not supported in ILINX Flex
In ILINX Flex 9.5, users can drag and drop files into the thumbnail tab. If no documents are created, then dropped files will be added to the batch as a loose page. Once a document is created, dragging files into the document tab will add the dropped files to the document. You can also select multiple files to drag and drop into the Flex Viewer.
Similar to ILINX Capture, if there are multiple files in the document viewer, you can drag and drop a drop file over another file to rearrange their order in the document or batch.
Note: Flex Mobile – Android does not support the use of dragging and dropping pages
ILINX Desktop Scanning Service Installation
When scanning documents in Flex, the scanner settings configured in ILINX Content Store will be utilized in Flex. When scanning for the first time in Flex, you will receive a download for the ILINX Desktop Scanning Service, which contains TWAINService properties that are required to use scanners in a Flex environment. Flex now also includes client-side barcode extraction and separator capabilities similar to the Barcode IXM in ILINX Capture. For more information on this feature, refer to the ILINX Capture 9.5 – Technical Guide: Barcode Section.
Note: The Scanner feature within the document viewer is only available on Windows devices, and can only be installed by users with local admin privileges
Note: Databar barcodes will not be able to be recognized for extraction and separation
|
ICON
|
DESCRIPTION
|
|---|---|
| File Upload icon – Select the dropdown then select Append to add a new document. If there are already documents added, selecting the dropdown allows users to Replace, Insert Before, or Insert After. | |
| Scanner icon – Select the dropdown then select Append to add a new document. If there are already documents added, selecting the dropdown allows users to Replace, Insert Before, or Insert After. If this is the first time scanning into ILINX Flex, users may be an ILINX Desktop Scanning Service prompted that will be required to be installed to ensure the scanner can connect. Administrators may choose to deploy the service resulting in the users not being prompted. | |
| Delete icon – Highlight the desired document in the Thumbnail panel and select Delete from the dropdown. | |
| Save icon – Selecting Save from the dropdown will open the Save dialog box where the user enters the Filename and location, Destination format, Content to save, and the number of pages to save. | |
| Previous/Next icon – If more than one document is added, using these arrows will navigate through one document at a time. Compound documents may not display all pages. | |
| Zoom icons – Using these icons will zoom in and out as well as be able to select the fit using the dropdown next to the %. | |
| Rotate icons – These icons will rotate the selected document right or left. | |
| Toggle icon – Using this option will toggle two or more images in the viewer allowing the user to view one document in the viewer or the ability to scroll in the viewer to see all documents. | |
| Full-screen icon – When the window is maximized, clicking this icon will make the Flex viewer full-screen and hide all other Flex displays. Clicking again or selecting the Esc key will change back to the Flex window. |
> Thumbnails – This screen will display all thumbnail-size documents within the batch. 
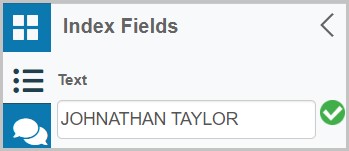
> Index Fields – Clicking here will display the index values that are available to identify the document being captured.
> Comments – Users can add comments at the time of capture by typing into the lower box and clicking ‘Add‘. Comments may be sorted by Author or Date as well as ascending or descending.
Once the user logs on to ILINX Flex using their preferred browser, the home screen will appear welcoming to a variety of user experience options to choose from including:
> Navigation panel – This is the leftmost panel, allowing users to easily navigate ILINX Platform solutions within ILINX Flex.
– New document – Capture documents into ILINX Content Store Applications.
– New work item – Capture documents into ILINX Capture Batch Profiles.
– Applications – Lists the ILINX Content Store Applications available to search and view documents in the repository.
– Content Views – List of Views that have been configured within ILINX Content Store.
– eForms – List of eForms that have been configured to be initiated from within ILINX Flex.
– Workflow views – List of Views that have been configured within ILINX Capture.
– Dashboards – List of Dashboards that have been configured within ILINX Analytics.
– Help – List of ILINX links that navigate the user to the help guides and community tabs.
> ILINX Flex center working panel – This is the center panel and includes links to new features and help guides.
> Layout options – Selecting the gears in the upper right corner will open the Layout Options panel. See User Interface Configuration for more details.
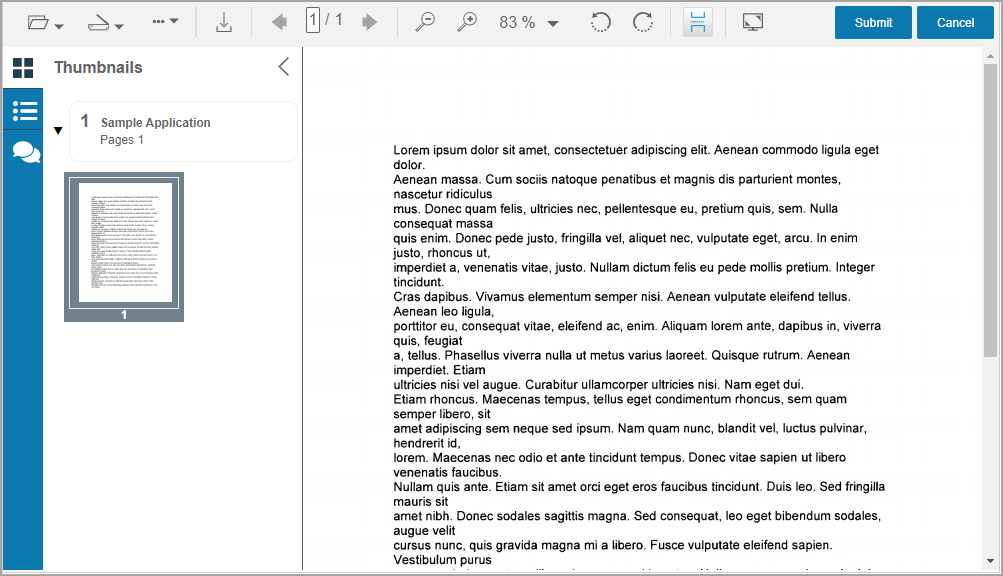
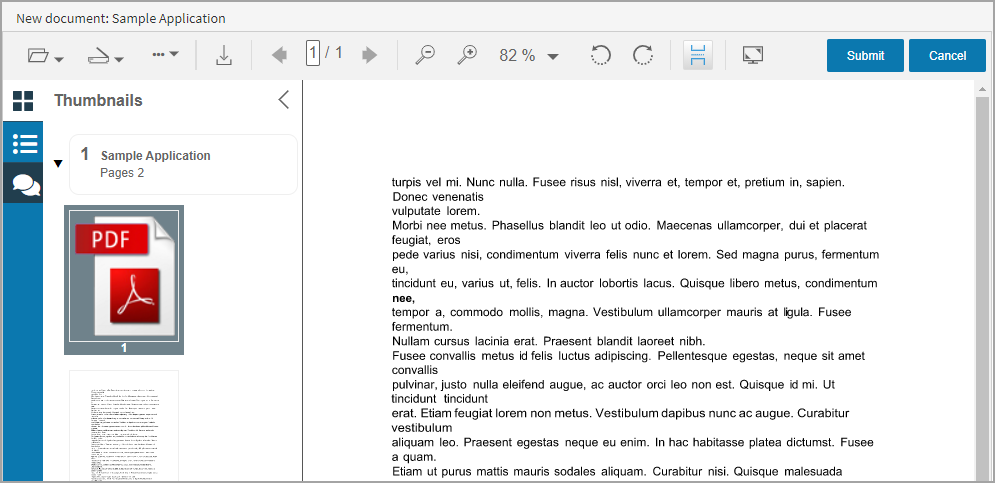
New document
Selecting New document… in the navigation panel will open a window that allows the user to select the desired ILINX Content Store Application that has appropriate permissions.
After selecting the desired Application, the user may use the top menu items to select file import or scan to add a document to the selected application.
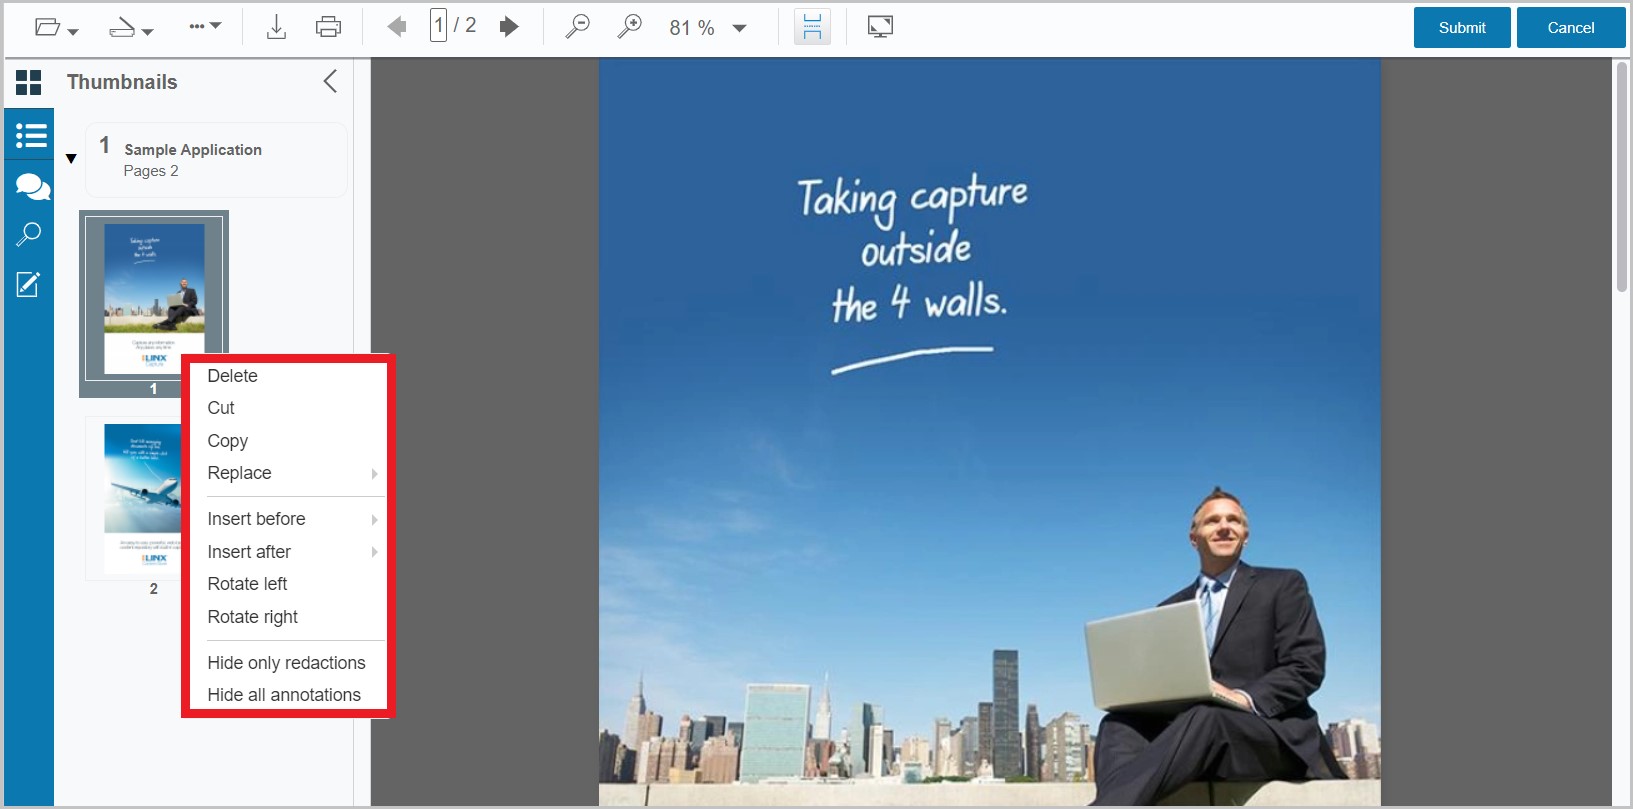
After the document has been added, additional steps may be taken before the document is submitted. Using the top menu, replace, insert before, or insert after can be used to add additional pages to the document being submitted either by scanning or importing. Right-clicking on the thumbnail provides the ability to delete, cut, copy, replace (via scan or import), insert before (via scan or import), insert after (via scan or import), and hide annotations. If the added file is a PDF File, you can select Convert to TIFF to convert the file to a TIFF file.
After indexing the document as desired, selecting Submit will save the new document. Selecting Cancel will discard all documents in that window.
Note: ILINX Content Store redactions are not available in the ILINX Flex viewer
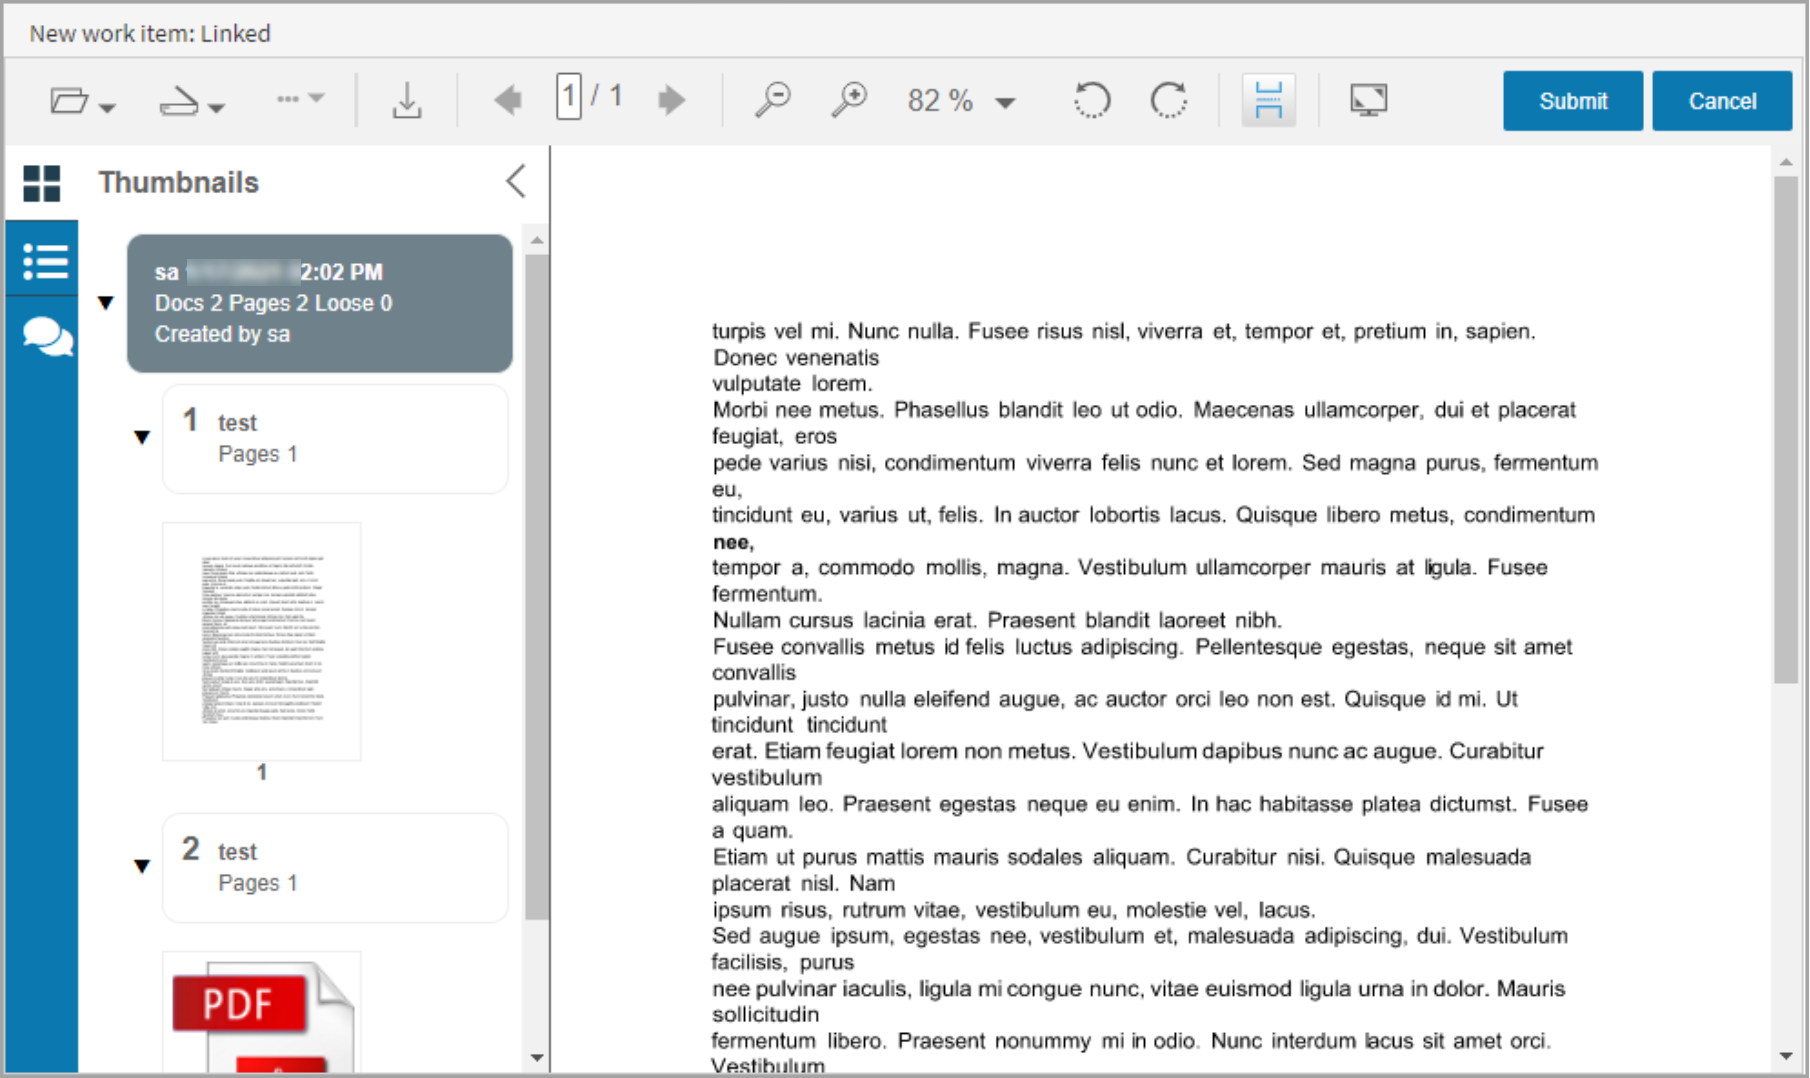
New work item
Selecting New work item… in the navigation panel will open a window that allows the user to select the desired ILINX Capture Batch Profile that has appropriate permissions.
After selecting the desired batch profile, the user may use the top menu items to select file import or scan to add a document. Using the dropdown, the user can select an Unclassified document, or the Doc Type configured within the ILINX Capture Batch Profile. After indexing the document as desired, selecting ‘Submit‘ will save the new document. Selecting ‘Cancel‘ will discard all documents in that window. Multiple documents may be onboarded and indexed.
Applications
The next item in the navigation panel is Application names that have been created within the ILINX Content Store server. All configurations and permissions are made in ILINX Content Store. Also in the list is the ‘Checked out to me’ option. After selecting an application, the URL can be copied and pasted into an internet browser to view the results in that tab as well.

From the ILINX Flex client, you can perform a global search, advanced search, or simply browse through the Applications list. When you click on an Application, an initial set of documents within the Application is displayed.
Note: Applications cannot be created from within the ILINX Flex client, this function can only be performed using ILINX Content Store
Adding a New Document
ILINX Flex allows you to upload new documents into an Application directly. To accomplish this, follow the steps below:
Step 1: Select an Application to add the new document.
Step 2: Click the New button at the top right corner of the ILINX Flex Application page.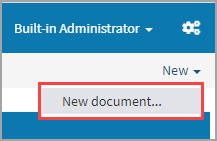
Step 3: When the drop-down menu appears, select Document.
Step 4: In the New Document window, select the file you would like to upload.
Step 5: Enter the appropriate index field information.
Step 6: Click the OK button to add the new document.
Note: If adding documents into Flex via scanning, there are page maximums. See chart below:
|
Max Number of Pages
|
DPI
|
Image Mode
|
|---|---|---|
| 450 | 200 | Black/White |
| 135 | 200 | Grayscale |
| 120 | 200 | Color |
| 400 | 300 | Black/White |
| 60 | 300 | Grayscale |
| 60 | 300 | Color |
When scanning files to ILINX Flex, keep in mind that color depth, scan resolution (DPI), availability of local machine resources, network bandwidth, and even the type of scanner being used are all critical factors in determining how many pages can be scanned into the application.
Using Advanced Search
Advanced search allows the user to enter index field values for searching within a specific Application. To include additional search conditions, click on the Click here to add new condition button. To remove an added condition, right-click on any part of the condition line and select Remove this condition. Any added condition is only available for the life of the current window.
System values are designated in the drop-down list by surrounding brackets [ ]. To run an unabated search of a particular Application, double-click on the Application’s name; be sure that all index field values are null. An initial set of documents will be returned. You may also use the Reset all search fields link to return the Advanced Search to default settings.
Note: Pressing Alt + S allows you to show the advanced search option/view parameters, and Alt + H allows you to hide these options

Interacting with Documents
ILINX Flex gives the user several document management options. You can access these options by right-clicking on a document in the results list.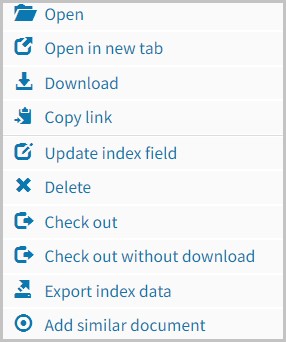
> Open – Allows you to open the document to view. This option does not check out or permanently edit the content but allows the document to be opened. If the ILINX Content Store system has been configured with the optional document rendering module, the selected document will be presented in a new browser tab. If the system is not configured with the document rendering module, the user will be prompted to launch or download the selected document.
> Open in new tab – Allows you to open the document to view in a new browser tab. This allows you to update index fields, annotations, etc. from a new tab and then submit the document if desired.
> Download – Allows you to download a document to the desired location. This can be useful for traveling needs where you do not have access to either the ILINX Content Store server or the internet.
> Copy link – Using this option will copy an encrypted link to the document or form that can be shared with others.
> Update Index Fields – This feature allows you to modify the index field values for one or more documents.
> Check out – Using the same checkout functionality used in ILINX Content Store, checkout allows the document in the application to be checked out for updating or editing. At any time, you can right-click a checked-out document from the ILINX Flex Application page and discard the checkout. This will revert the document to its original state before being checked out.
> Update Index Fields – This feature allows you to modify the index field values for one or more documents.
> Delete – This option permanently deletes the document from the Application.
> Check out – Using the same checkout functionality used in ILINX Content Store, check out allows the document in the application to be checked out for updating or editing. At any time, you can right-click a checked-out document from the ILINX Flex Application page and discard the checkout. This will revert the document to its original state before being checked out.
> Check out without download – Using the same checkout functionality used in ILINX Content Store, check out without download allows the document in an application to be checked out of an application without being downloaded to your local machine. This allows you to update or edit the document freely from ILINX Flex and then check it back into the application as an updated version of the doc.
> Export Index Data – Clicking this option will download a . CSV file containing the index values for the selected document.
> Add a similar document – This allows you to add a document to the Content Store Application from the Applications tab or Content Views tab. From this option, the same document type and index values from the source document will be the same as the new document that you are adding.
Comments Thread
When viewing a document, a Comments thread generates a discussion about the document. The administrator sets the permission for a group to view and/or add to discussions.
> A comment entry can have up to 1,000 characters per entry. A visual of the number of characters will appear next to the discussion box as the text is entered.
> The Comments area can be collapsed/expanded by the user as desired.
> Choose to sort comment entries by Author or Date as well as most recent or oldest.
> When a comment is added to a thread, the user’s name and the date entered are attached.
> Once saved, a comment cannot be removed, and previously entered comments cannot be modified.
Note: When a user views a comment from a batch and changes the Sort by drop-down option, it does not refresh the comments list
Flex Annotation Options
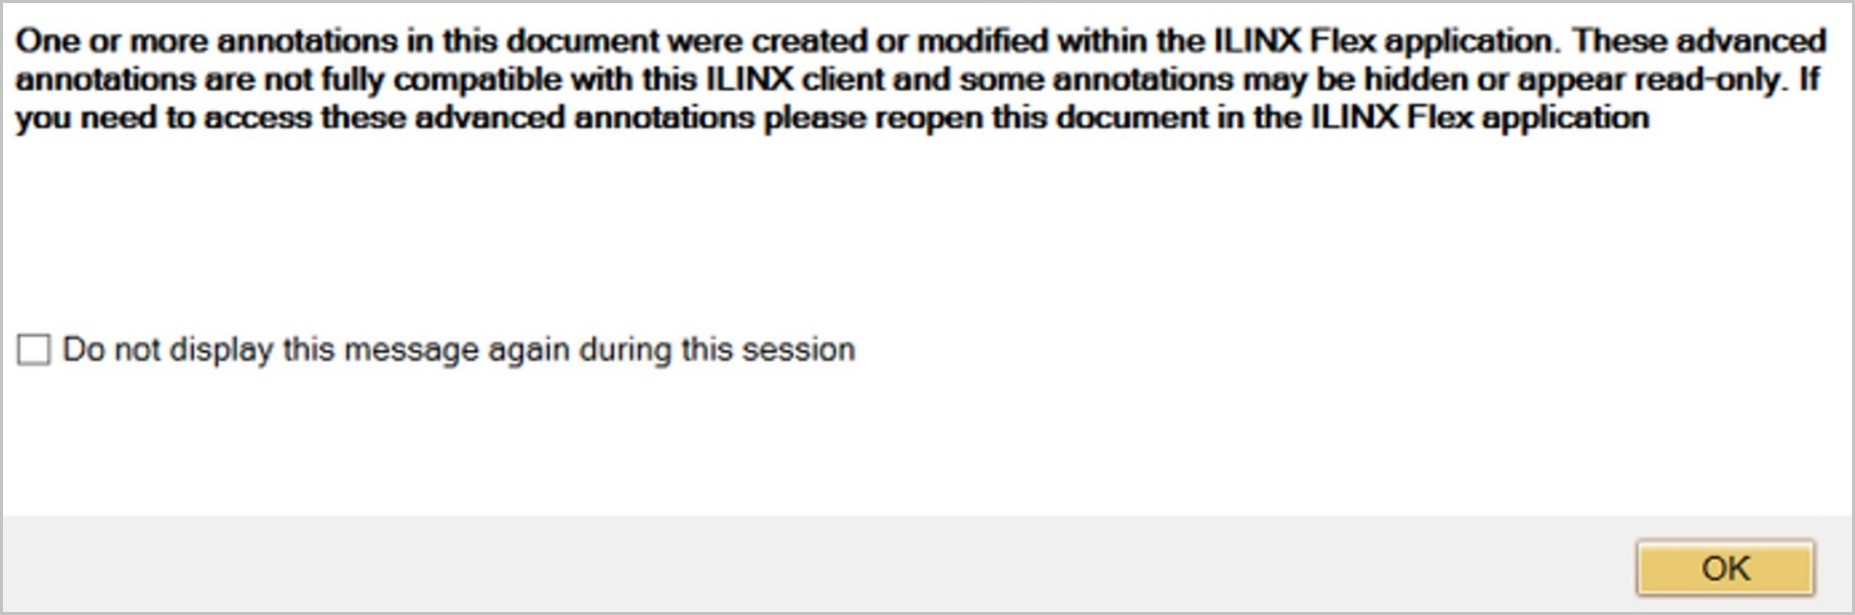
In Flex, there are five available annotation types: Highlight, Redaction, Line, Arrow, and Text. Additionally, in Flex these annotations have additional options that are NOT supported in Capture or Content Store. Therefore, when you view documents in Content Store or Capture that have used the unsupported annotation options, an error box will display.
Note: Only raster images, PDF files, and TXT files(Content Store documents only) are supported with applying Flex Annotations
|
ANNOTATION
|
FLEX ANNOTATION OPTIONS (Unsupported in Capture or Content Store)
|
|---|---|

Highlight |
N/A |

Rubber Stamp |
|

Redaction |
|

Ellipse |
|

Line |
|

Text |
|

Sticky Note |
|
As noted, if certain annotation options are utilized in Flex, they may be hidden or may not be viewed properly in Capture or Content Store and the message below will display when a document is opened in one of those products.
Document Versioning
ILINX Flex allows you to directly check out documents from applications from your ILINX Content Store host server. The documents are saved to your hard drive, where they can be edited, and then checked back into ILINX Content Store. Previous versions of a given document can be restored (prompted to the current version), and document checkouts can be discarded (if editing is not needed, accidental opening of the wrong document, etc.).
This check-in/check-out system allows for streamlined development of documents. Checking out a document also gives the user the ability to work on documentation without connecting to the network.
Checking Out a Document
Step 1: Search for the desired document in the correct application.
Step 2: Select the document(s) you wish to check out. Multiple documents may be checked out at the same time.
Step 3: Right-click to open the context menu. Select Checkout.
Step 4: Select your desired location to download the document.
> The document is downloaded to the local machine. It can be accessed directly from your computer without logging in to ILINX Content Store or ILINX Content Store Flex.
Checking In a Document
Checking in a document will save the edited document as a new version.

Step 1: Log in to the ILINX Flex profile that checked out the document.
Step 2: Expand the Application names option in the navigation panel and select Checked out to me
Step 3: Select the document line you would like to check in; right-click to bring up the context menu, then select Check-in. The check-in window will open to complete the check-in.
Step 4: Select the file to upload and check in.
Step 5: Specify the sort of changes you made to the document: Major or Minor.
Step 6: You must comment on the status of the document; what you changed, the state of the document, etc. If left empty, a permanent red asterisk and a red box will appear around the Comment section.
Step 7: With all fields completed, select “Submit” to check in the document.
Another option in the context menu is Discard checkout – This option will disregard any changes that may have been made and remove the checkout.
Content Views
Selecting the Views navigation option will expand a list of Views that have been configured in ILINX Content Store that the logged-in user has permission to. Features in the Views option match what is available in the Applications section.
Creating an Addressable Search
eForms
The next navigation option available in the ILINX Flex client is eForms. Selecting eForms displays the list of forms that have been configured in ILINX Capture eForms and permissions have been assigned to the logged-in user. No configurations can be made within the ILINX Flex client. Once a completed form is submitted, it will continue processing through ILINX Capture workflow.
Note: When configuring an Oracle database lookup for eForms, both Oracle 32-bit and 64-bit drivers must be installed on the eForms server in two separate folders. Also, verify that the Oracle driver installer is added to the Oracle bin folder in the system PATH environment variable

Note: The ILINX Flex client will prompt the user to stay or leave the current page if data has been entered and the user chooses to close or change the page. This configuration is made within the ILINX eForms properties
Workflow views
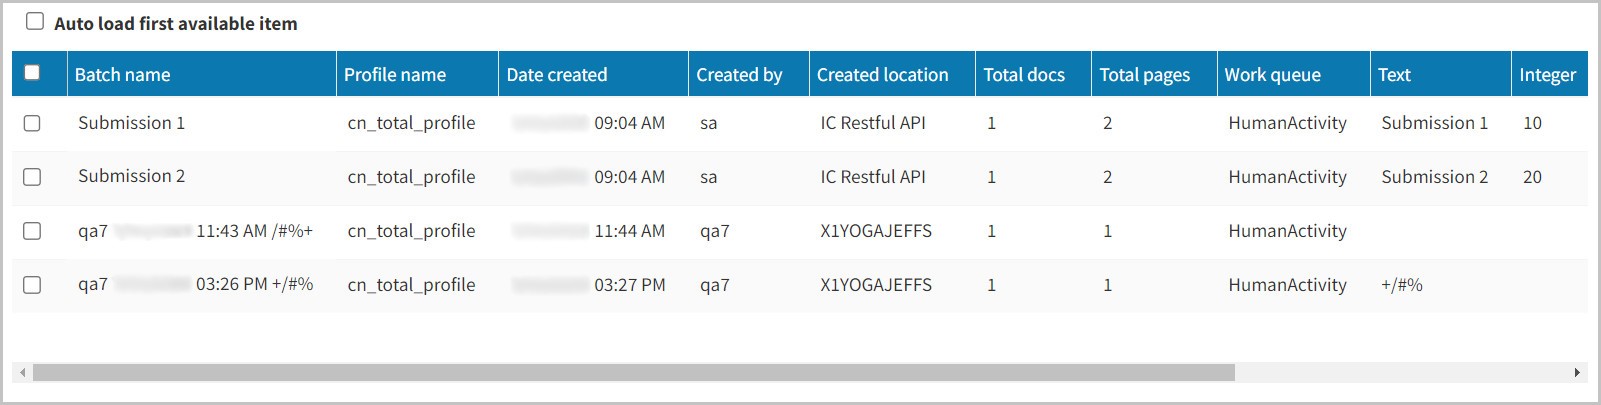
The next option available in the ILINX Flex client is Workflow views. When this option is selected, a list of ILINX Capture Views that have been configured and permissions assigned is available in the center panel. Selecting a batch will display the form in the rightmost document viewing panel.
Right-clicking on a document in the results panel will open a context menu that allows users to make updates similar to ILINX Capture. These menu items include:
> Open: Opens the selected document.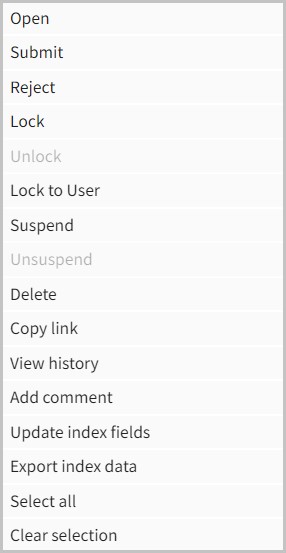
> Submit: Sends the document to the next function in the workflow.
> Reject/Approve: Users can reject or un-reject a document based on business processes.
> Lock/Unlock: Users can lock the selected document to themselves so others may be unable to make updates.
> Suspend/Unsuspend: Users can send batches to the ‘Suspended’ queue in ILINX Capture. To Unsuspend, users must have permission to do so and the View needs to have the ‘Can see suspended items’ setting enabled.
> Copy link: Using this option will copy an encrypted link to the document or form that can be shared with others. This works for both eforms and non-eform workflow items.
> Add comments: Will add comments attached to the document that may be viewed when the document is open.
> Update index fields: Opens context menu enabling users to modify index field values.
> Delete: Deletes the selected document.
> History: Opens a window that displays the History of the document.
> Select all: Select all documents in the results window.
> Clear selection: Clears all documents that are selected.
Advanced Capture Documents
ILINX Flex 9.5 adds the recognition and classification confidence values and graphic indications into the UI. The images below show an example of the recognition and classification confidence values displayed next to the document name and the configured extraction field value in the viewer.
Note: When a batch is in a Human Activity that supports “Verification” for the current user, the viewer will scroll to the appropriate document page and auto-scroll/auto-zoom to the configured extraction field values from the Advanced Capture Definition
Dashboards
The ILINX Capture Analytics product provides dashboard capabilities for visualizing ILINX Capture workflow statistics and data. The ILINX Analytics product adds more dashboard data sources including ILINX eForms, ILINX Content Store, and external databases. Analytics requires separate licensing. Please see the ILINX Analytics guide for more information and configuring options. Dashboard widgets can be created in ILINX Capture and will be viewed in Flex. For more information on creating dashboard widgets, please see the ILINX Capture Administrator Guide.
Keyboard Shortcuts
The following list of keyboard shortcuts are available in ILINX Flex:
New document
- No keyboard shortcuts are available here.
Document Viewer
- Alt + R
- Hide only redactions
- Alt + A
- Hide all annotations
Applications
- Alt + S
- Open Advanced search
- Alt + H
- Close Advanced search
Content Views
- Alt + S
- Open Advanced search
- Alt + H
- Close Advanced search
New work item
- No keyboard shortcuts are available here.
Workflow Views
- Alt + S
- Open View parameters
- Alt + H
- Close View parameters
eForms
- No keyboard shortcuts are available here.
Dashboards
- No keyboard shortcuts are available here.
URL Settings Flex
Using the URL Tools
Another way ILINX Flex can view and edit documents is by utilizing the URL Tools. This is done by configuring a URL search that calls multiple API calls with different template formats. If the URL search is successful, then the related document will be opened in the Flex document viewer. The following templates are displayed below:
- Advanced Search
- https://[ServerName]/ILINXFlex/main/advanced-search/[ApplicationName]?mode=advsearch&[IndexFieldName]=[IndexFieldValue]
- ServerName
- The server domain of your ILINX Flex server.
- ApplicationName
- The ILINX Content Store application name of the application to be searched in.
- IndexFieldName
- The name of the index field that is related to the document being searched for.
- IndexFieldValue
- The value of the index field that is related to the document being searched for.
- ServerName
- https://[ServerName]/ILINXFlex/main/advanced-search/[ApplicationName]?mode=advsearch&[IndexFieldName]=[IndexFieldValue]
- View Doc
- https://[ServerName]/ILINXFlex/view-doc?aid=[ICS_ApplicationID]&did=[ICS_FileID]
- ServerName
- The server domain of your ILINX Flex server.
- ICS_ApplicationID
- The ILINX Content Store application ID of the application being searched in. This can be found in the ILINX Database.
- ICS_FileID
- The ID of the file that is being searched for. This can be found in the ILINX Database.
- ServerName
- https://[ServerName]/ILINXFlex/view-doc?aid=[ICS_ApplicationID]&did=[ICS_FileID]
- View Search
- https://[ServerName]/ILINXFlex/?mode=viewsearch&viewname=[ICS View Name]&[IndexFieldName]=[IndexFieldValue]
- ServerName
- The server domain of your ILINX Flex server.
- ICS View Name
- The name of the ILINX Content Store view to be searched in.
- IndexFieldName
- The name of the index field that is related to the document being searched for.
- IndexFieldValue
- The value of the index field that is related to the document being searched for.
- ServerName
- https://[ServerName]/ILINXFlex/?mode=viewsearch&viewname=[ICS View Name]&[IndexFieldName]=[IndexFieldValue]
Additional Parameters
Below is a list of parameters that may also be used to create unique URLs to open documents.
|
PARAMETER
|
VALUES
|
DESCRIPTION
|
|---|---|---|
| appname | [Application Name] | Name of the Application the document is stored in. |
| docid | [unique docid] | The GUID docid is stored in the database for the desired document. |
| ShowOnlySearchResults | True False |
True = Returns only the results of the search entered in the URL. This includes the Global search as well as the New menu. False = Displays tabs, global searches, etc. along with returning search results. |
| expandindexpanel | 1 0 |
1 = Expands index panel 0 = Hides index panel |
| minview | 1 0 |
1 = Hides all except the document, annotations, and comment functionality. 0 = Default setting that opens in Flex Viewer. |
Permissions
All permissions for ILINX Flex are inherited based on the administrative permission configurations within ILINX Capture, ILINX Content Store, and ILINX eForms. For configuration details, please refer to the Administrator’s guide for the desired product.
ILINX Capture Administrators Guide Permissions
Other Options
User Interface Configuration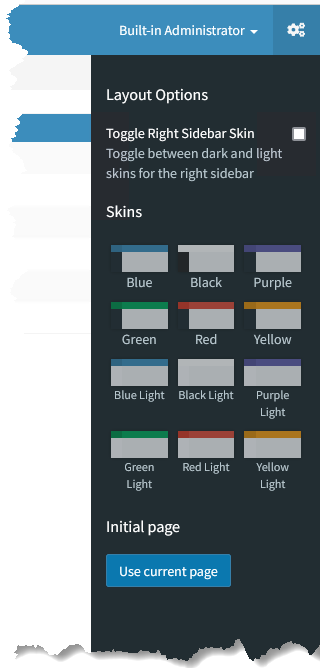
Within the ILINX Flex client, users can change the user interface skin as desired. This option is located in the upper right of the screen by selecting the gears icon. Open the screen and choose the desired color combination. Also, the user can toggle the Layout Options sidebar between light or dark skins.
Initial Page will allow the ability to specify an initial page when Flex is opened. Currently, Flex uses the Home Page, but the Initial Page feature allows the user to choose which page is opened when they log in. To use this feature, navigate to the desired page, then use the “Use Current Page” button under Initial Page, to select it as a default. A notification will state “Your current page has been saved as the initial page” Press OK.
Administrators can hide or show this option through a system-wide setting in the ILINX Flex web. config as well as choose the desired skin layout.
Step 1: In your system’s installation folders, navigate to Program Files\ImageSource\ILINX Web Platform\.
Step 2: Open the web.config XML file.
Step 3: Configure the keys as desired:
> <add key=”HideConfigurationPanel” value=”false”/> – Default is False.
> <add key=”DefaultSkinName” value=”skin-blue”/>
Other possible skin values:
– skin-blue
– skin-black
– skin-purple
– skin-green
– skin-red
– skin-yellow
– skin-blue-light
– skin-black-light
– skin-purple-light
– skin-green-light
– skin-red-light
– skin-yellow-light
Step 4: After saving, the default user interface will now display the settings configured.
Custom snap-in Index panel
Administrators can add custom logic to allow ILINX Flex to use a document index snap-in panel for both ILINX Capture and ILINX Content Store documents. To add the custom JavaScript code, see the sample code at:
<Installation Location>\Program Files\ImageSource\ILINX Web Platform\Content\js\ilinx.indexpanel.custom.extension.js
Idle Timeout Logic
Administrators can configure the ability for Flex to timeout when a user remains idle while logged in for a certain amount of time, where they will have to log in again after this occurs. There are two keys in the <Installation Folder>\Program Files\ImageSource\ILINX Web Platform\web.config file that control this feature:
> EnableIdleTimeout – This key can be either true or false, where the idle timeout logic will occur if set to “true.”
> IdleTimeoutInMinutes – This key sets the amount of times in minutes that a user can remain idle until Flex logs them out.
Custom Forgotten Password Page
If you have created a custom page for your users to access if they have forgotten their login password, you can link directly to the page on the ILINX Content Store login screen.
Step 1: In your system’s installation folders, navigate to Program Files\ImageSource\ILINX Web Platform\
Step 2: Open the web.config XML file.
Step 3: Configure the custom URL by adding the ForgotPasswordLink node in the XML file.
> For example: <add key=”ForgotPasswordLink” value=”https://myserver/myforgotpasswordpage.html” />
Step 4: The login screen will now display a Forgot your password? button that links to your designated URL.
Global Search Visibility
The Global search functionality may be configured to be hidden or visible to users within the client interface. This option is configured as “False” by default. To configure the Global Search to be hidden:
Step 1: Open the ILINX Content Store database.
Step 2: Modify the ‘ICS_AppSettings’ table.
Step 3: Set the ‘GlobalSearchIsNotVisible’ key to “True”.
Step 4: Save the changes.
Step 5: The clients must be restarted to view the changes made.
Public Mode
ILINX Flex provides a “public” mode for the Flex client, not just the SDK. When a user accesses the Flex client, they can see a list of ILINX Content Store and ILINX Capture Views that are available to the ILINX public user. While using the public mode within ILINX Flex, the interface will not display the username or can ‘Change password’, ‘Sign out’, or other configuration options.
Implementation
Step 1: In your system’s installation folders, navigate to Program Files\ImageSource\ILINX Web Platform\.
Step 2: Open the web.config XML file.
Step 3: Configure the custom URL by adding the publicUser nodes in the XML file. Add Nodes:
<add key=”publicUserName” value=”<ILINX Username>” />
<add key=”publicUserPassword” value=”<Password>” />
Step 4: ILINX Flex can now be accessed in ‘Public Mode.’
Settings
Clicking on the ‘Cog’ in the top right of the screen, administrators have multiple settings that they can configure:
> Toggle Right Sidebar Skin – Toggle between dark and light skins for the right sidebar. By default, this setting is disabled.
> Skins – These settings display multiple color schemes that you can choose to change the skin for ILINX Flex.
> Initial Page – This setting shows a ‘Use current page’ button, which when pressed, will save the current page the user is on and use that page as the displayed page once the user logs back onto ILINX Flex.
> Auto-load Documents – Automatically load documents when opening content folders. By default, this setting is disabled, where content folders will have to have an Advanced Searched executed before displaying data.
> Auto-open Advanced Search – Automatically open the Advanced Search panel for content folders. By default, this setting is disabled.
> Double-click to open the batch – This setting allows batches to open when double-clicked. By default, this setting is disabled, where it only takes a single click to open a batch in a workflow view.
> Freeze headers of result list – This setting provides the ability for administrators to freeze the header row of the results list so that it always appears at the top of the page, even when scrolling down hundreds of rows. Furthermore, it prevents the result set from scrolling horizontally even if there are 50-80 columns in the result set. By default, this setting is enabled.
> Hover highlighting – This setting shows an indicator whenever you highlight the setting. By default, this setting is enabled.