Contents
Have another version? ILINX version 9.5, ILINX version 9.1, ILINX version 9.0, ILINX version 8.6, ILINX version 8.5, and ILINX version 8.0, Older versions are included only in the installation package.
About
In a highly active business world, digital experiences extend beyond the office, and operations and customers can’t be put on hold until you can handle business in person. ILINX Capture Mobile enables on-demand engagement between your staff, partners, customers, and constituents. ILINX Capture Mobile Mobile makes it easy to initiate and follow up on processes, intake needed documentation, review/approve requests, and much more — anytime, from anywhere.
This document describes the ILINX Capture Mobile system that will be utilized by end users. This includes capturing documents on mobile and assigning metadata to batch and document-level index fields. This guide is specifically for iPhones. For Android phones, refer to the ILINX Capture Mobile – Android 9.6 guide.
Custom branding graphics may be added to the mobile app login screen and home page. Refer to the ILINX Capture Administrator Guide Mobile App section of the ILINX Capture 9.6 Administrator Guide for configuration steps and for information on administering the ILINX Capture system.
Supported Devices
ILINX Capture Mobile is supported on iPhone and iPad devices running iOS 14 or higher as well as supported on Android 11 and higher on certain devices. For further details, refer to the ILINX Support Matrix.
iPhone/iPad
Installation
For corporate users, please check with your Administrator to determine the download location used by your Enterprise to acquire the ILINX Capture Mobile app.
ILINX Capture Mobile is publicly available on the iOS App Store® by searching for “ILINX Capture Mobile”.
Follow the following steps to install ILINX Capture Mobile on iOS:
Step 1: Open the App Store by tapping the App Store icon: ![]()
Step 2: Tap the search icon.
Step 3: Type “ILINX Capture Mobile” into the search field.
Note: The search field is not case-sensitive
Step 4: Tap the Get Button.
Opening For the First Time
Step 1: Once installed, select the ILINX Mobile icon to open the app: ![]()
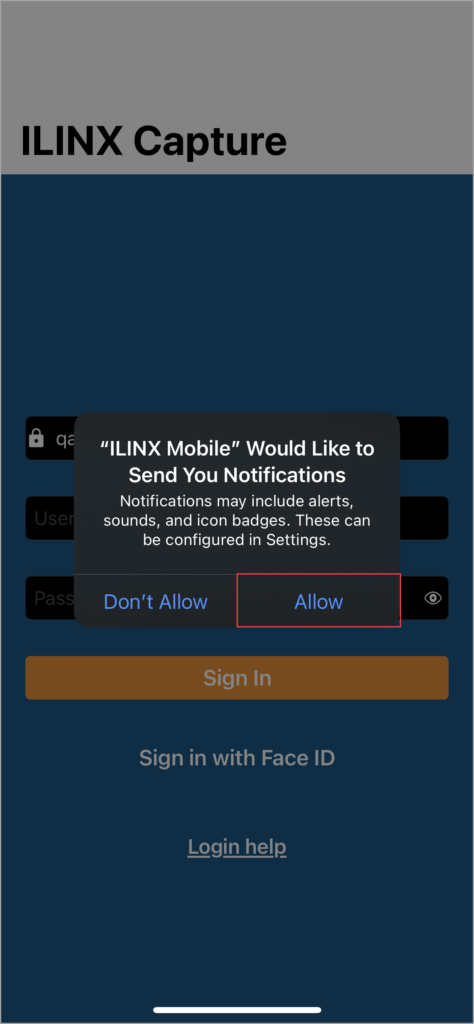
Step 2: The notifications screen may appear asking if you would like ILINX Mobile to send you notifications. Select Allow.
Note: The app will not work correctly without these permissions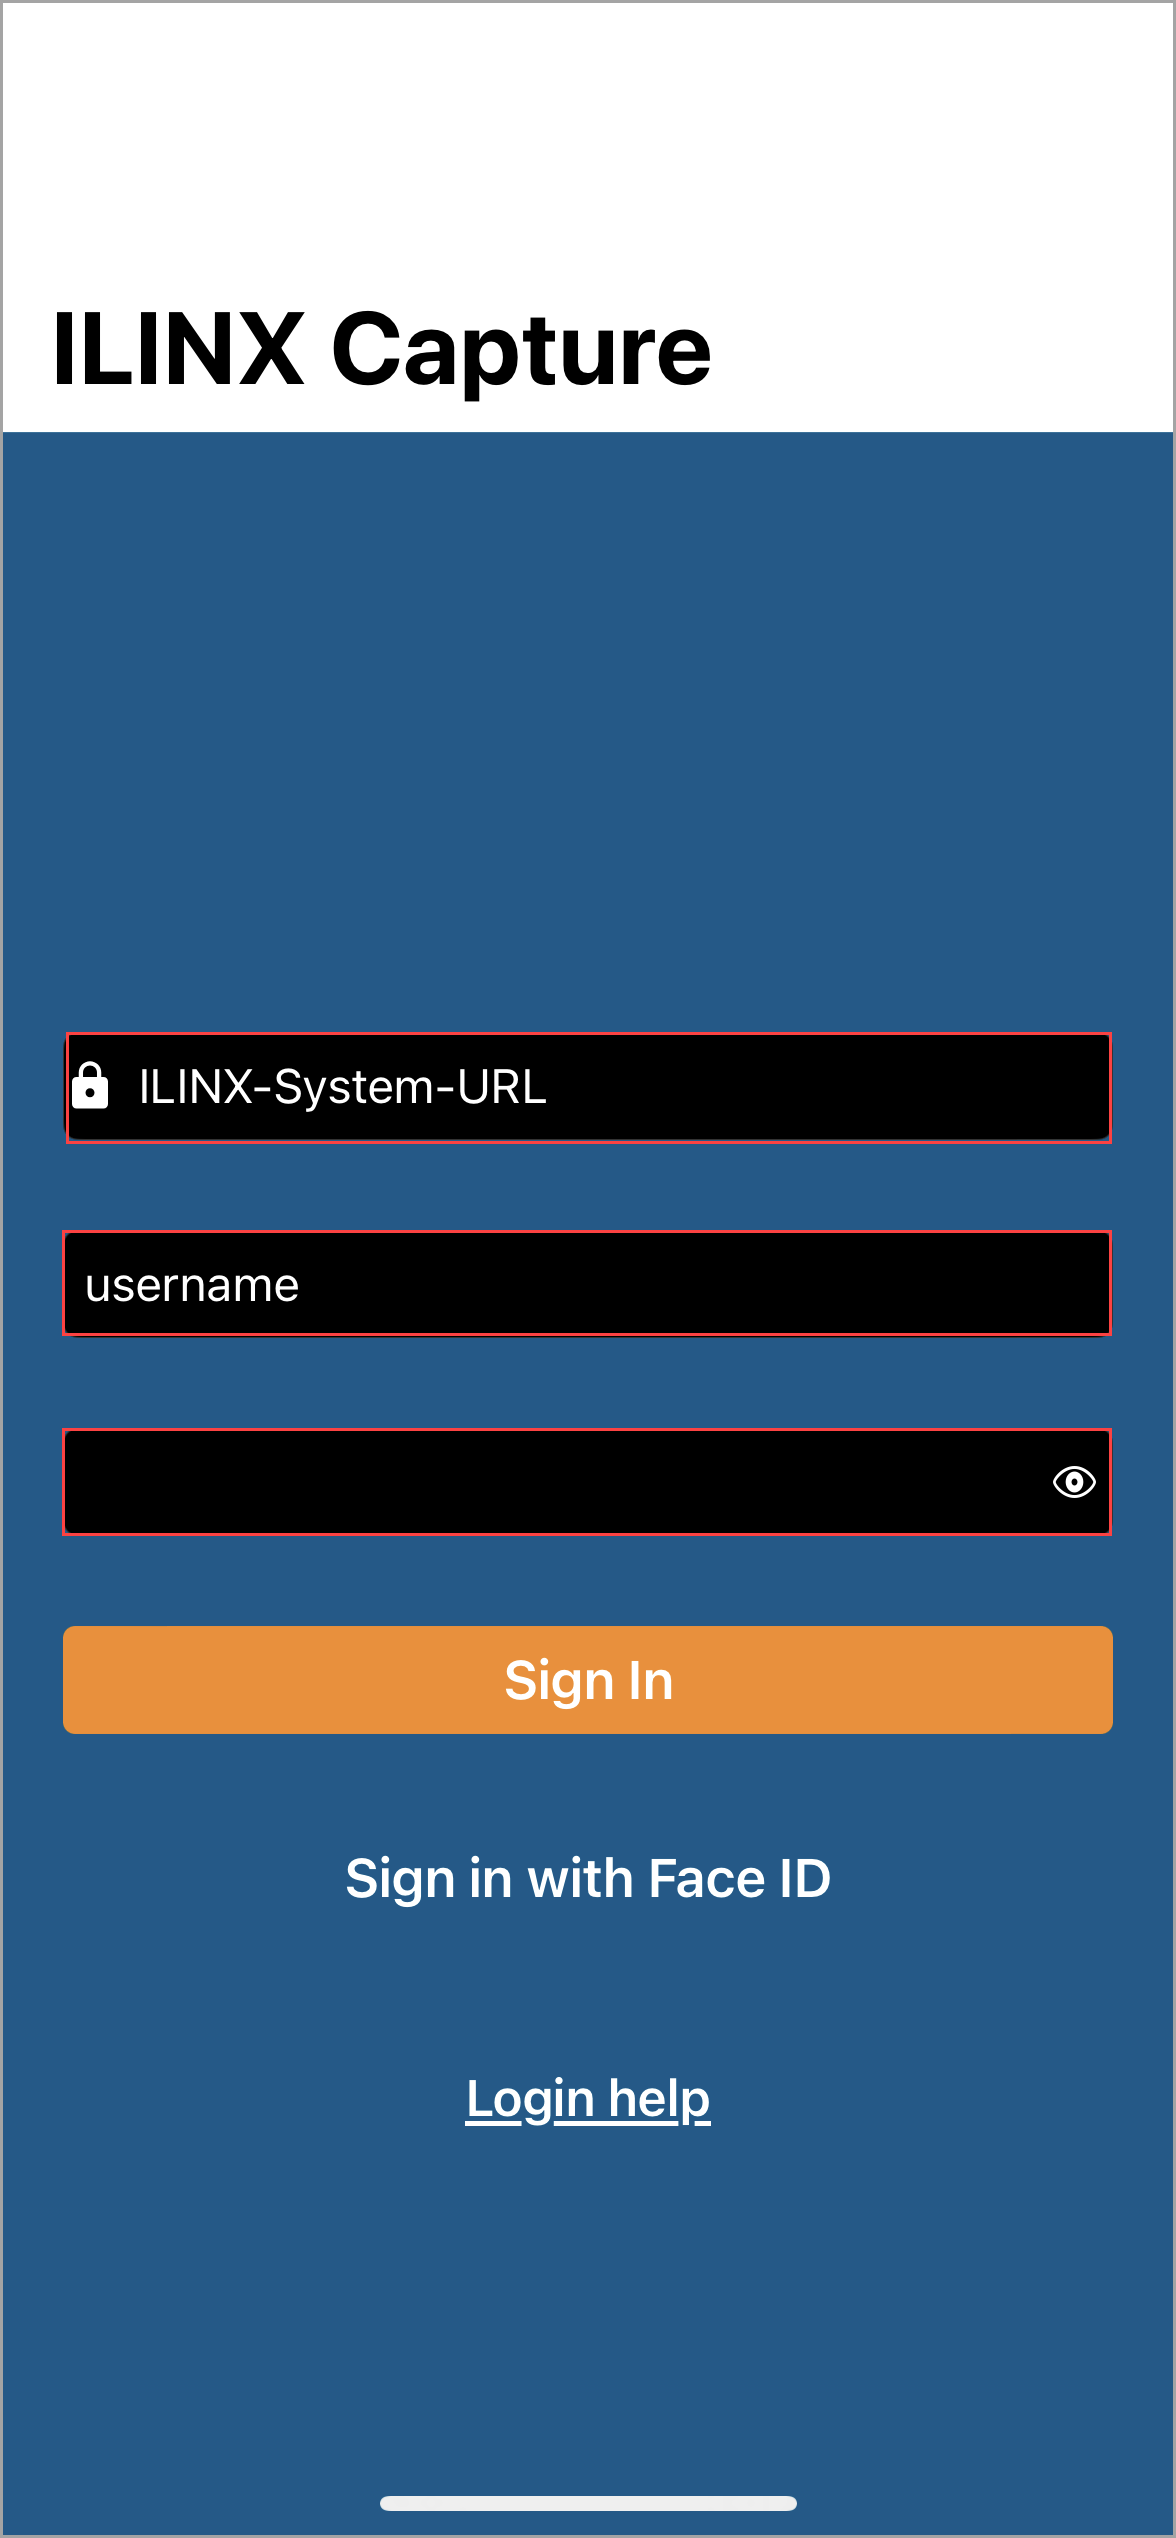
Step 3: Enter the URL for your Enterprise ILINX Capture system. This may be provided by your Administrator for logging into ILINX Capture Mobile.
Step 4: Enter your username and password provided by your Administrator.
Note: The username is not case-sensitive; the password is case-sensitive
Note: You must use a built-in or ADFS user account to sign in to ILINX Capture Mobile. Capture Mobile does not support Azure AD log-ins
Step 5: Tap on the Sign in button to validate your credentials and log in.
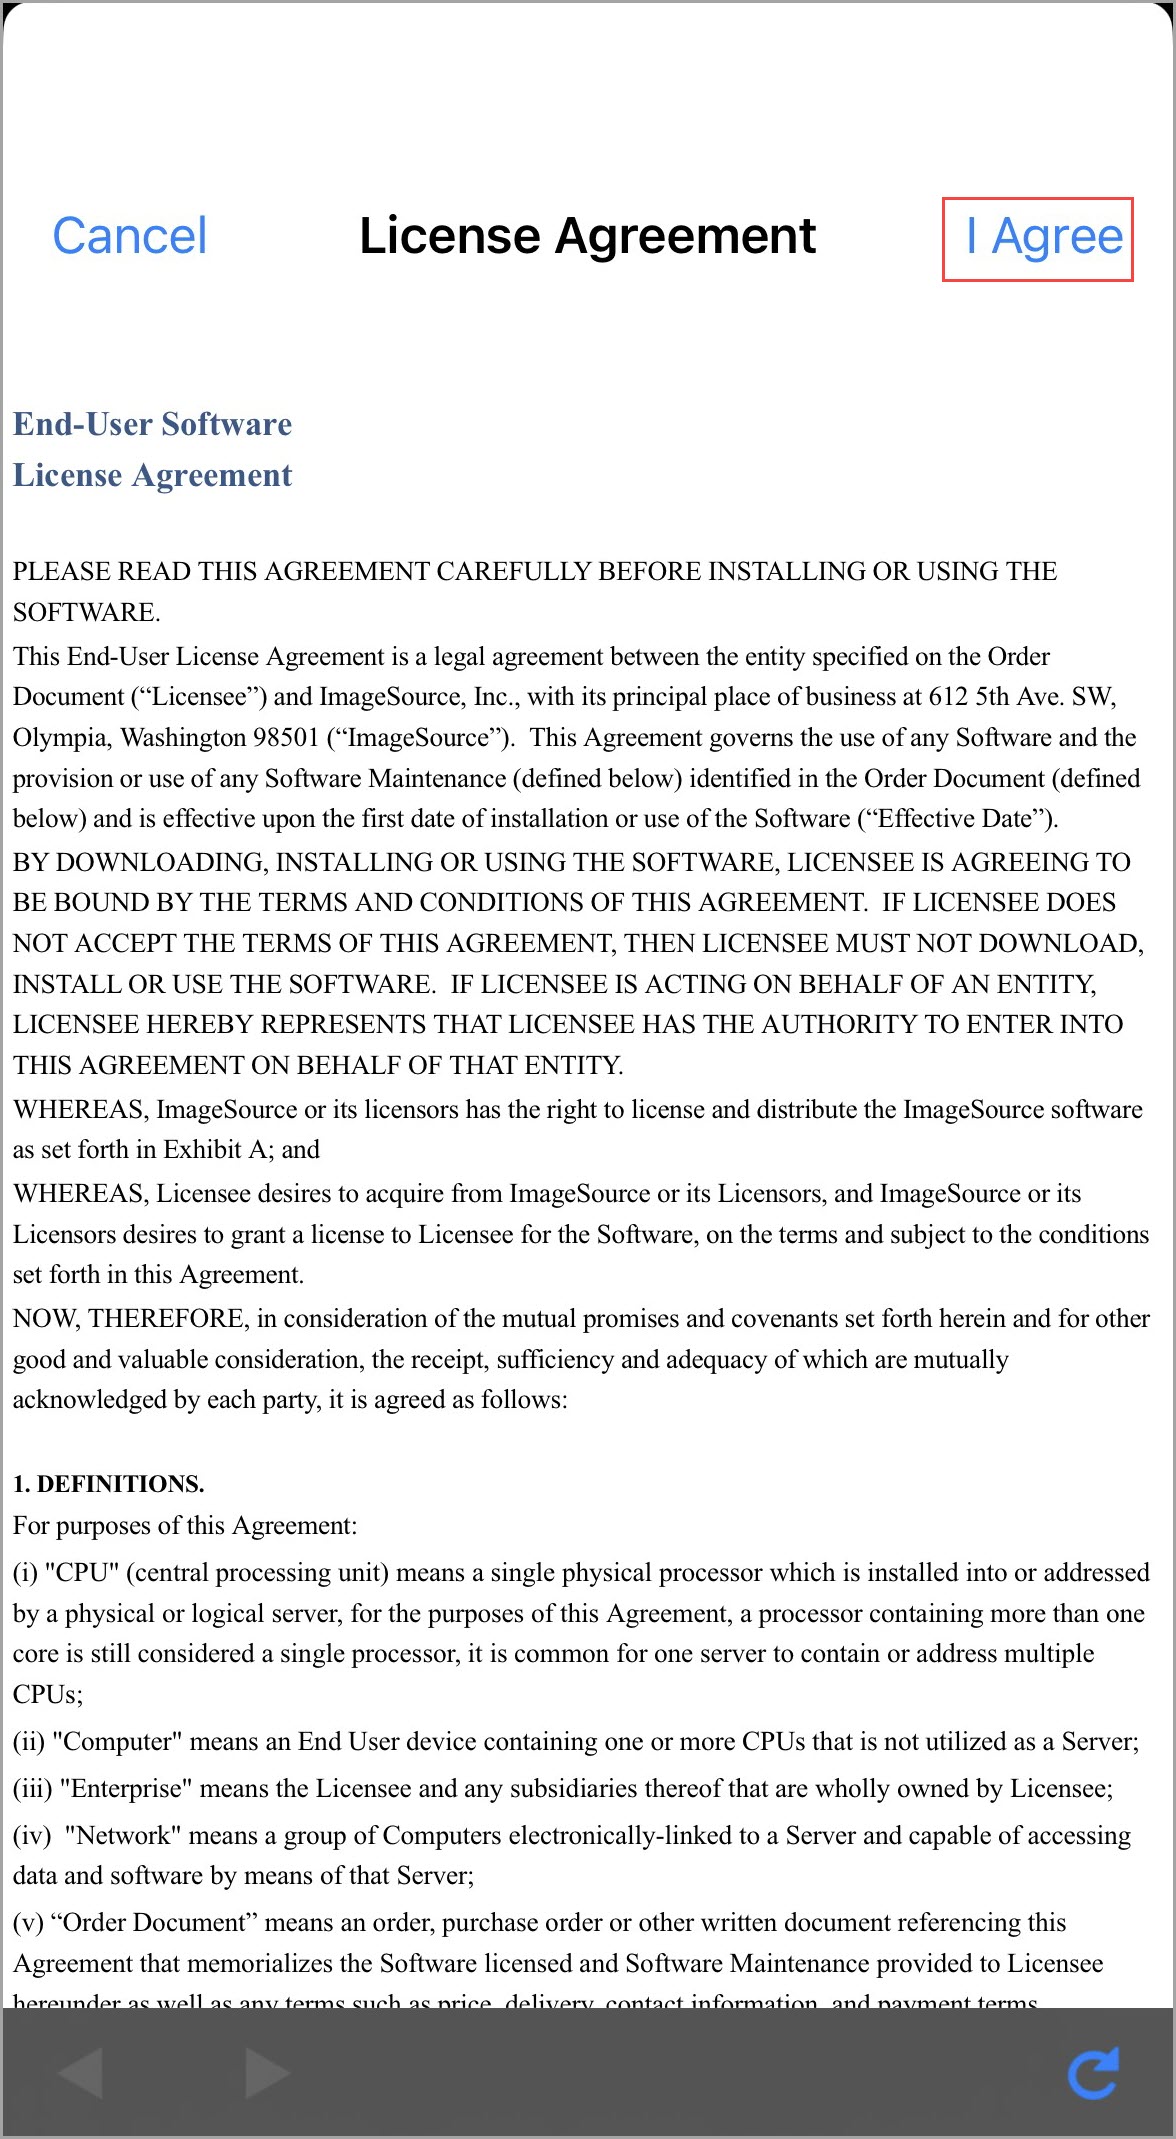
 Step 6: Next will open the End-User Software License Agreement. Read through this agreement and select I Agree in the top-right corner to continue.
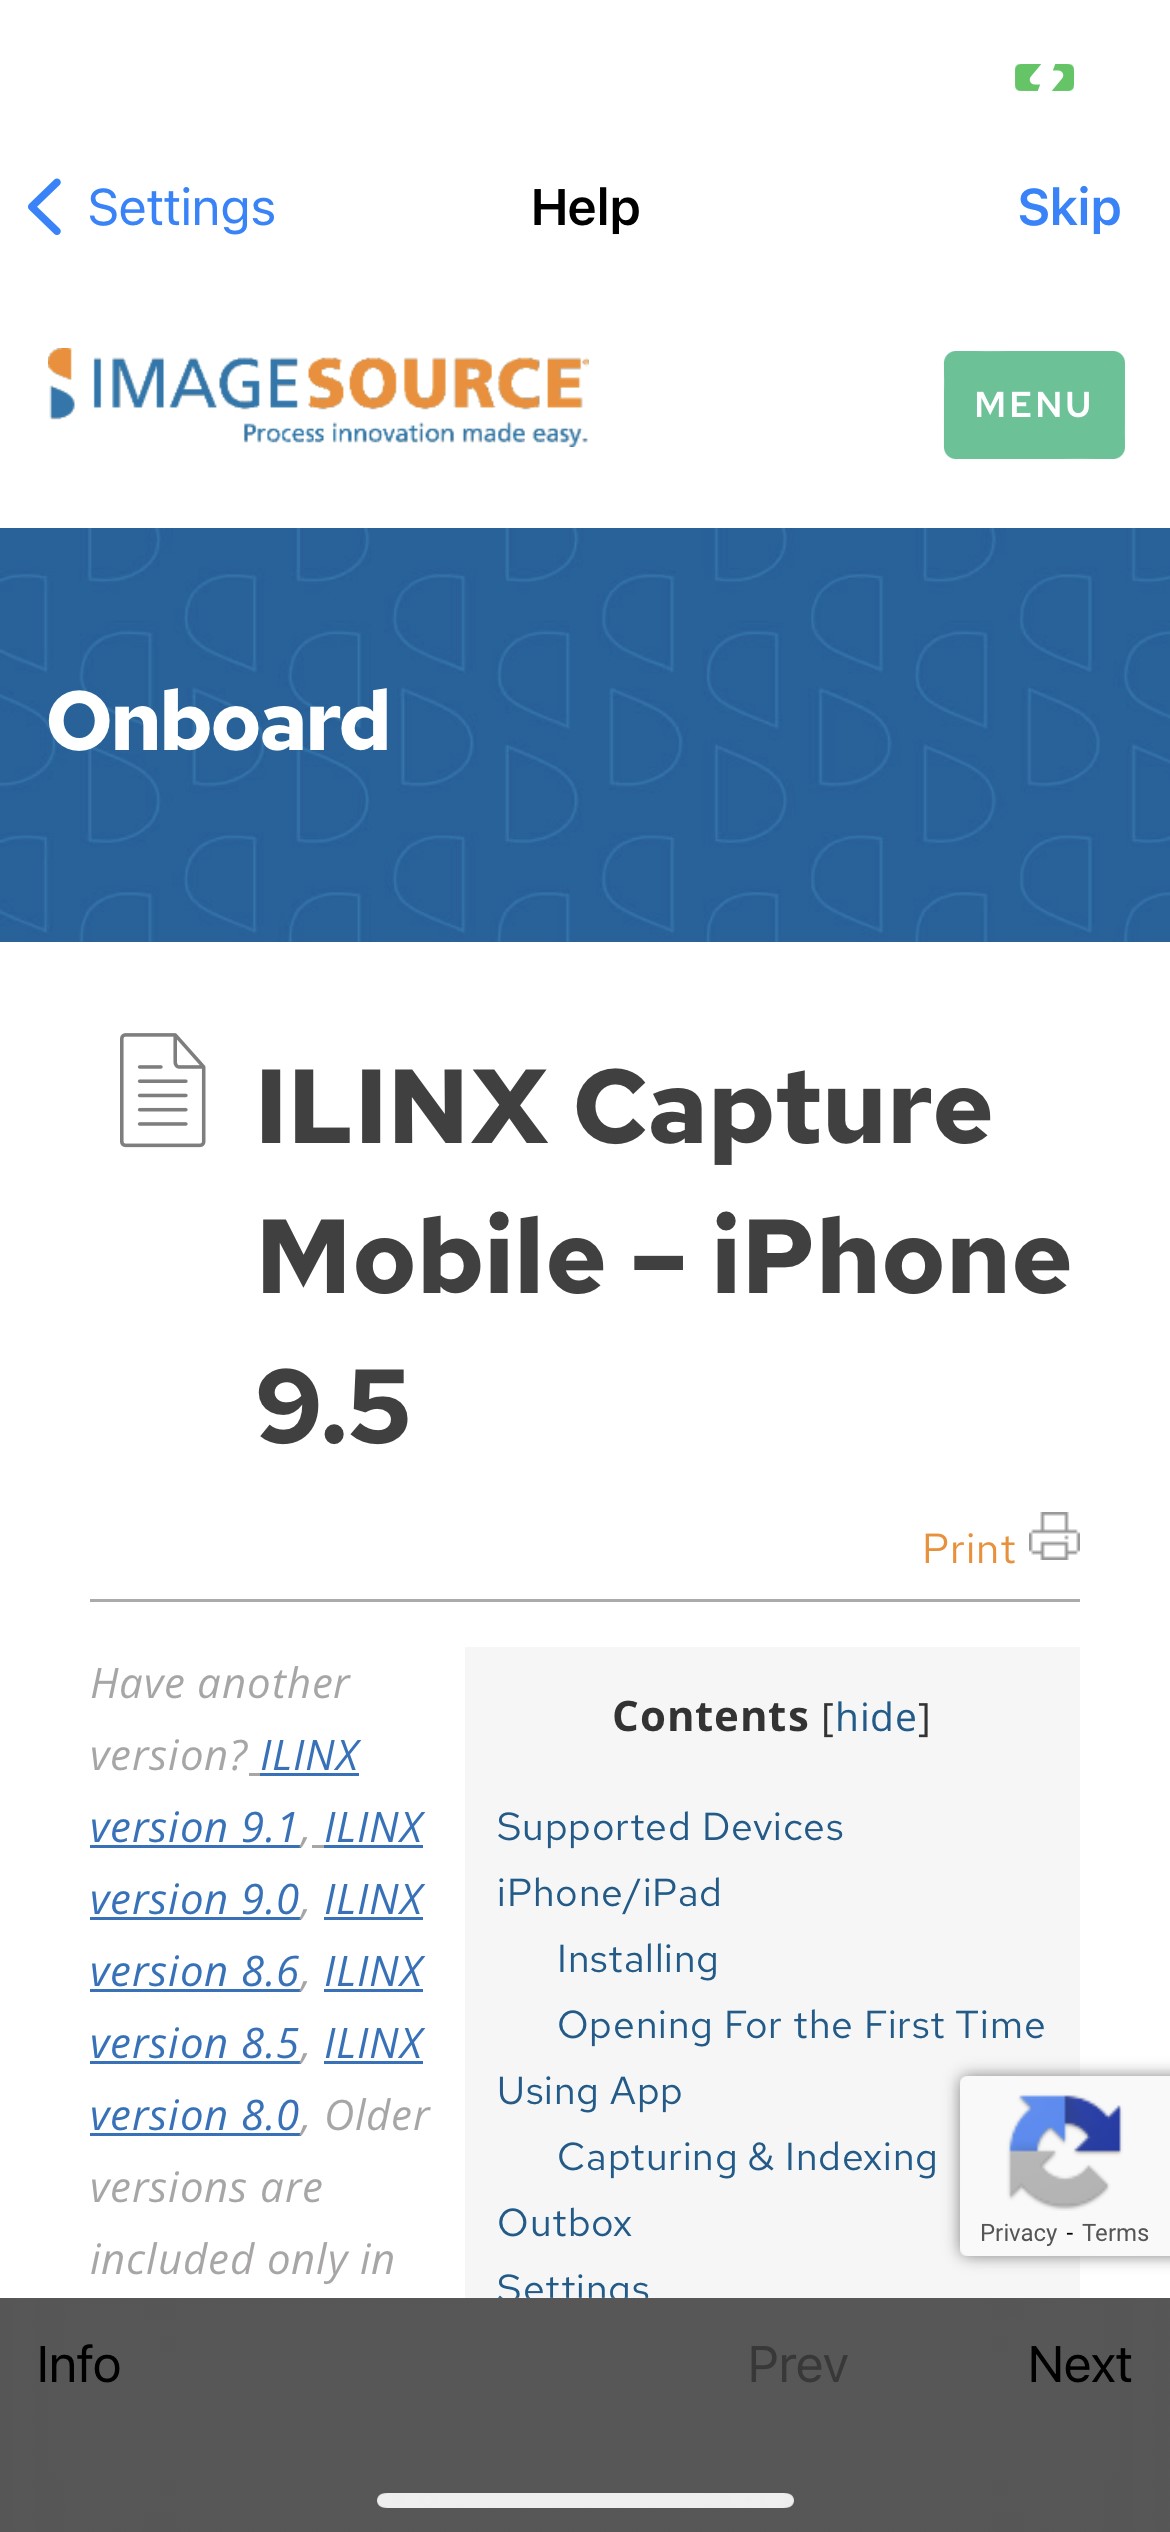
Step 7: Next, the Help screen will open the ILINX Capture Administrator Guide from the ILINX Help Center. Click Skip to return to the ILINX Capture Mobile Home Page. You can refer to the documentation at any time by going to Settings – Help.
Note: The username is not case-sensitive; the password is case-sensitive
Using the App
Capturing & Indexing
Step 1: From the main screen select the appropriate Batch profile and Doc type for the content you are going to capture by utilizing the drop-downs.
Note: A default batch profile and Doc type will be selected based on the URL and credentials entered
Step 2: Tap the plus symbol “+” at the bottom of the screen to capture a picture of a document.
Step 3: Select Camera or Video to capture new images or Photos or Video Library to Capture a previously taken image from your gallery.
Step 4: If you are taking a new photo, place the document on a flat surface and hold the phone a couple of inches over it, in the portrait position and level with the document.
Tip: The background the document is on should be flat and provide a good contrast to the document (not white)
Step 5: Slowly raise the camera device until all four edges of the document nearly fill the viewfinder (about 11” above the document).
Note: Your iPhone camera will then automatically focus, capture, and crop the image of the document
-
- Flash On – Tapping this option will toggle to Flash Off. Using the camera’s flash (on by default) will provide the best photo quality.
- Auto crop on – Tapping this option will toggle to Auto crop off.
Step 6: A preview of the photo will be open on the next screen. Use the lines in each corner and edge to manually crop the image as needed.
Note: Auto crop will remove edges of the image that it reads as not part of the document. Manual cropping may be necessary even though the Auto crop is turned on
Step 7: The main screen will show all of the images taken as part of the current document.
Step 8: Tap on an image to make any necessary edits, retake the photo, or delete the image.
Note: Tapping the right arrow will go directly to the index screen
Screen Elements
Capturing & Indexing Screen
The following elements are available from the Capture & Indexing screen:
- Back arrow – Tap on the icon to return to the Main
- Edit – Tap to open the Annotations
- Trash can – Tap on this icon to delete the photo.
- Camera – Tap on this icon to retake the photo of the document.
- Left / Right arrow – Tap on these icons to switch between document photos as needed.
- Index – Tap to open the Indexing screen.
Annotations Screen
The Annotations screen will allow you to add redactions, highlights, and text to the document photo. The following elements are available from the Annotations screen:
- Cancel – Once an annotation type is selected, tap on Cancel to de-select that annotation type.
- Highlight – Selecting this icon and then tapping anywhere on the document will add a default size yellow square on the document. Tapping the square again will allow you to rotate and adjust sizing as desired.
- Redactions – Selecting the Redaction icon and then tapping anywhere on the document will add a default size black square on the document. Tapping the square again will allow you to rotate and adjust sizing as desired.
- Text – Selecting this icon and then tapping anywhere on the document will add a default size clear square on the document. Tapping the square again will open the default keyboard where you can enter text as desired.
- Trash can – This icon is active after tapping on an annotation. Tapping the Trash can icon once activated will delete the annotation selected.
Select Save when finished adding an annotation to close the Annotations screen.
Index Fields Screen
The Index Fields screen can be opened by selecting the right arrow from the Main screen or by selecting ![]() from the Edit screen. The following elements are available from the Index Fields screen:
from the Edit screen. The following elements are available from the Index Fields screen:
- Back – Selecting Back will open the previous screen.
- Submit – Selecting Submit will save and apply all indexes that have been added. Tap here after all metadata has been entered
- Batch index – Tapping here will expand the batch indexes that are configured for this system.
- Doc index – Below the Batch index field is the Doc index The title of this will vary based on the name of the Doc type configured for the Enterprise system. Tapping here will expand the doc-level index fields. These index fields are configured through the Enterprise system.
Note: When adding a value to a Date index field with “Include Time” enabled, Capture Mobile will only show the Time Picker and the date picker will not appear. Upon submission, the default value of the date will be 1/1/1753 with the submitted time included in the field
Outbox
If you are offline when you tap Apply will retain your captured document(s) and their associated metadata in the “Outbox” until you get back online. Submission will be automatically completed when you return online and the application is running.
Step 1: If there are documents in your outbox the main screen will have an Outbox button, tap it to view the documents.
Step 2: The document will open in the Outbox queue. Once you are back online, the batches will automatically be submitted.
Also, you may select the Submit All option to send them through manually.
Settings
Selecting the gear wheel on the main screen will open the Settings screen. The Settings screen includes: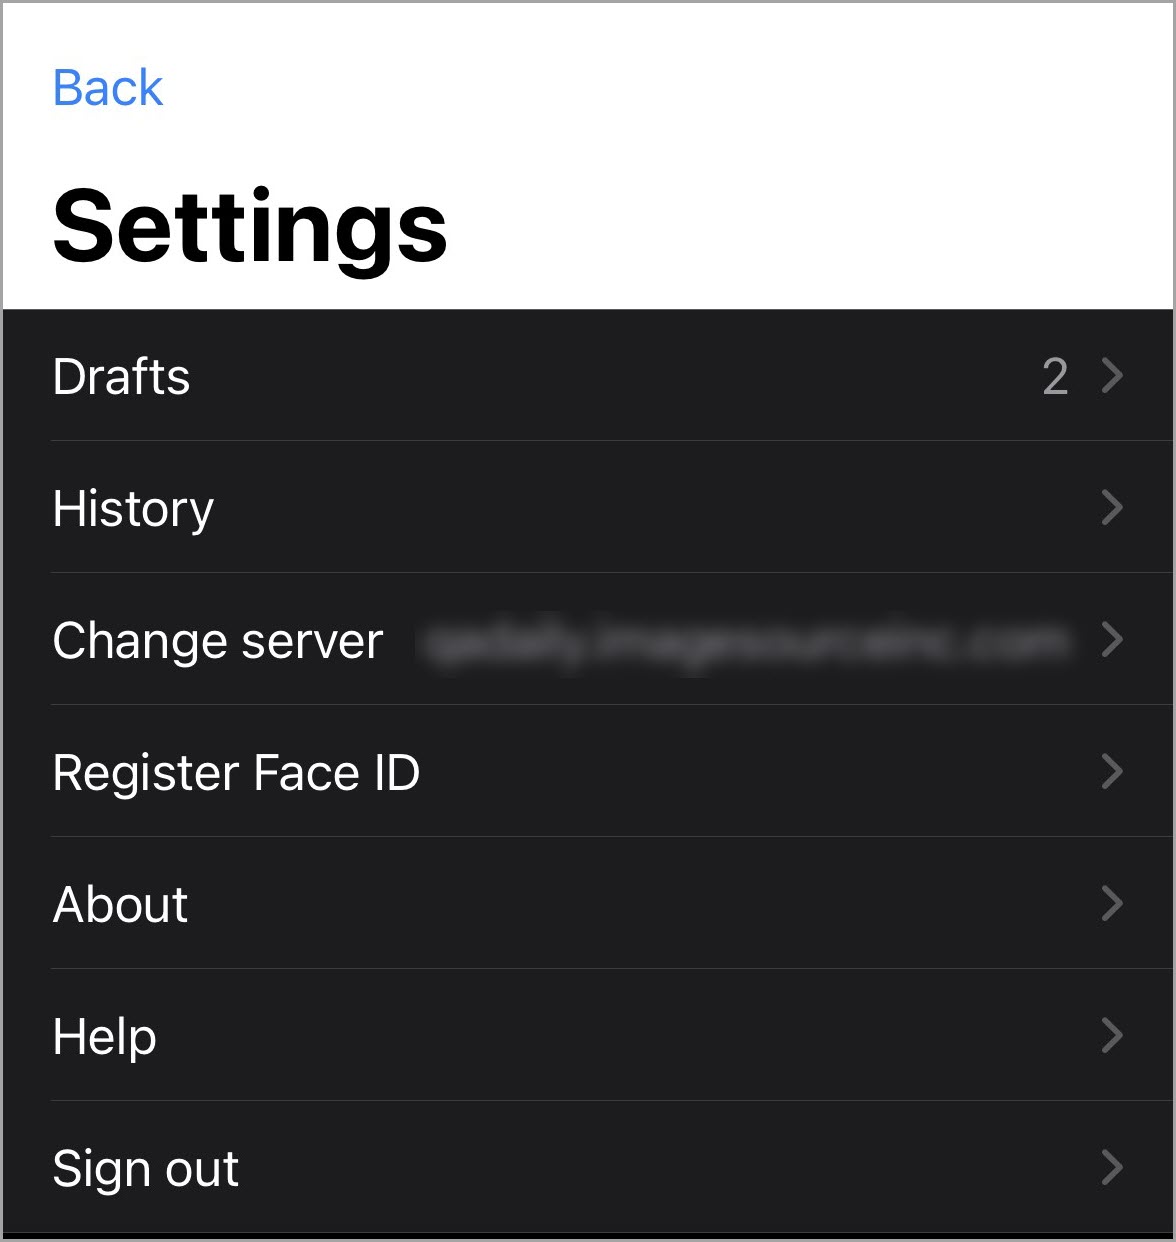
- Drafts – This option opens the Drafts screen where batches are stored. This screen is further described in the Drafts section.
- History – This option displays the past batches that have been submitted. When one of the batches is selected, information about the batch is displayed including the date submitted, Batch name, Batch type, Total docs and pages, Confirmation code, and current status of the batch.
- Change server – Selecting this option will open the same screen that appears when first installing the app. On this screen, you may enter a new URL, username, and/or password. Tapping Done will validate the credentials and once complete, will open the End-User Software License Agreement.
- Register Face ID – If the mobile device utilizes face recognition, users can configure to log in to ILINX Capture Mobile using this feature.
- About – This option will open the About screen which displays information such as the Version, Terms of Service, Privacy Statement, etc.
- Help – Selecting Help will open the Getting Started You can scroll through and tap Next to review all the screens. At the bottom of the screen is an Info option which will open additional information for the ILINX Capture Mobile software.
- Sign out – This option will sign out of the current session of ILINX Capture Mobile.
Drafts
Organizations may set permissions for a Batch Profile that requires content to be entered in an Index field. Within ILINX Capture Mobile if you are offline and there is at least 1 required field, the batch will be moved to Drafts. Unlike the Outbox, batches stored here will not be submitted automatically.
Step 1: To access the Drafts screen, select the cog icon from the main screen to open the Settings screen.
Step 2: Tap the Drafts option from the Settings screen.
Step 3: On the Drafts screen there may be several batches listed that require updating and submitting, tapping on a batch will open the Index Field Screen
Step 4: Enter the required index fields which are identified by the asterisks (*) and the red outline.
Step 5: Tap the Submit option when finished. If you are online, the batch will be submitted to the Enterprise system. If you are not online, the batch will be stored in the Outbox and automatically submitted when you are back online.
Okta SSO
To configure ILINX Capture Mobile to work with Okta authentication, ensure that the following keys are configured in the ICS_[AppSettings] table of the ILINX database:
- CaptureMobileOktaIssuer
- CaptureMobileOktaClientID
- CaptureMobileOktaRedirectUrl
- CaptureMobileOktaScope