Contents
Have another version? ILINX version 9.0, ILINX version 8.6, ILINX version 8.5, ILINX version 8.0, Older versions are included only in the installation package.
About
ILINX Capture, a key component of the ILINX ECM Platform, provides complete document automation, streamlining the process of acquiring, storing, accessing and securely routing documents while maintaining a lean, agile, and highly adaptable design.
Because it is browser-based, ILINX® Capture empowers anyone in your organization to capture information right at their desktop easily. The same is true for the management of the application, allowing deployment, administrative control, updates and upgrades from a central location.
This guide contains information on how to configure the ILINX Capture Email Import application, administrator tools, options and user guide.
Assumption: This guide assumes that the installation of the ILINX Capture product has taken place. For complete installation documentation, please see the ILINX Installation Guide
System Requirements
For general information on supported and recommended hardware, OS, web browsers, databases, etc. for ILINX products, please refer to the ILINX Support Matrix.
Note: ILINX eForm batches are currently not supported within this add-in
When installing onto a workstation using Outlook 2013 or higher, use:
ILINX Capture Email Import for Outlook 2013 v[Version number].msi
When installing onto a workstation using older versions of Outlook, use:
ILINX Capture Email Import for Outlook v[Version number].msi
Important Note: Currently the dialog box which allows users to choose their default scanner does not display for user with Office 2019 installed
Administrator Configuration Settings
To access the administrator configuration file, go to:
[Your installation folder]/Program Files (x86)/ImageSource/ILINX Capture Email Import/Outlook Add-in/ILINXEmailImport.dll.config
Note: If you do not see the ILIINXmailImport.dll.config file, make sure the show hidden files, folders and drives check box is selected in the Windows Folder and search options/view
The keys below allow the administrator to configure an automatic transfer of email properties into capture document index fields as new emails are onboarded into ILINX Capture. For example, to automatically populate a document index field called “Sender Email Address” with the sender address of the emails you are onboarding through the ILINX Outlook add-in, set the MailFrom parameter as shown:
<add key=”MailFrom” value=”Sender Email Address” />
You can follow this same approach with the other email properties; MailTo, MailSubject, MailBody, and ReceivedDate.
Note: Regarding the MailBody property: ILINX Capture has maximum index field lengths that may truncate extremely large email bodies
Open the file in Notepad to modify the configuration settings indicated below as necessary:
MailFrom
MailTo
MailSubject
MailBody
ReceivedDate
DisplayIndexingPanelOnStartup = True
AllowBatchToBeSubmittedWithLoosePages = True
Update the endpoint address to point to your ILINX web server.
IncludeMsgFile: Default is ‘False’. (Optional) Set ‘True’ to add the raw email (eml/msg) file to a new batch.
ConvertToPdf: Default is ‘True’. (Optional) Set ‘False’ to not include a converted pdf version of the email.
At least one of the settings but be set ‘True.’ If both of these parameters are set to false, an error will occur “The config file has incorrect settings…”
<add key=”IncludeMsgFile” value=”false”/>
<add key=”ConvertToPdf” value=”true”/>
Note: If using HTTPS, you will need to un-comment both the “default” and “streaming” bindings
End User Guide
Outlook Add-in
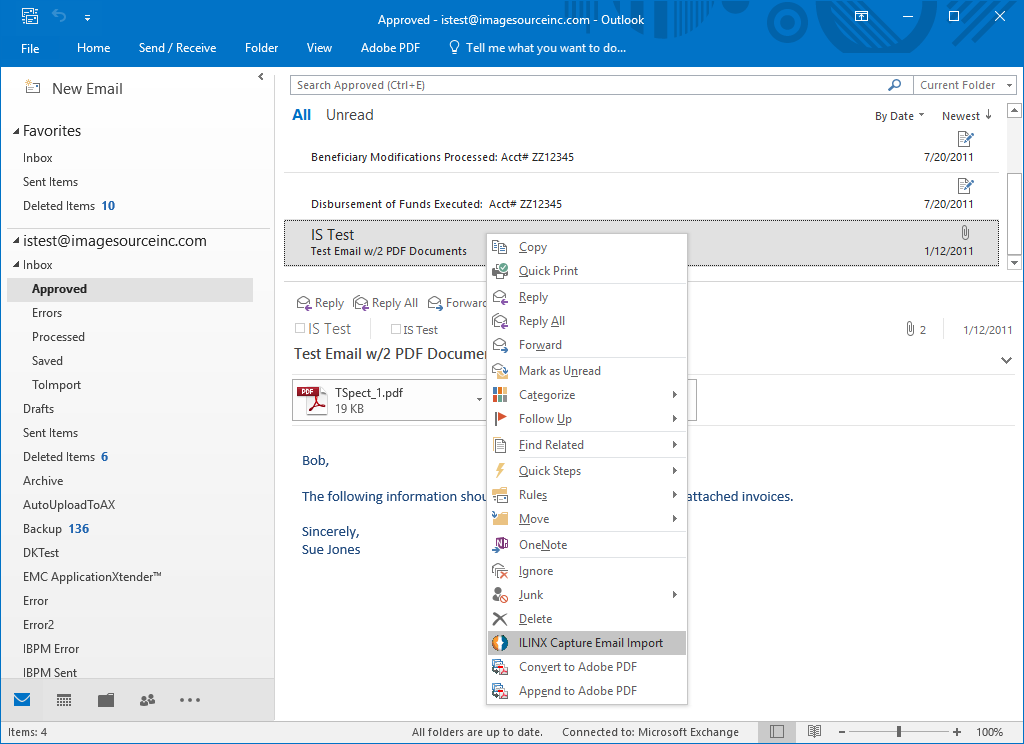
Right-click on an email and select ILINX Capture Email Import from the provided selections. This will launch the program and display the email import panel.
Note: ILINX Capture Email Import does not support Rich Text Format (RTF) emails. However, Rich Text Format attachments will process normally
Document Panel
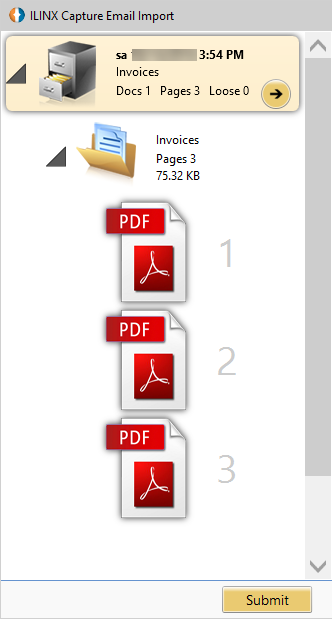 > Thumbnail pane – this pane lets you organize the batch of documents prior to indexing
> Actions are displayed by right-clicking on the file cabinet, document, or page icon (see further explanation below)
File Cabinet
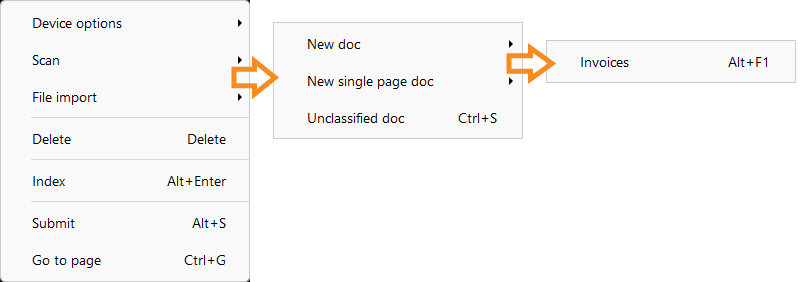
The container where current batch resides – a batch consists of one or many documents.
Right clicking on the file cabinet icon provides the following functionality:
Document
This can contain one or many pages. Right clicking on the document icon provides the following functionality:
Pages
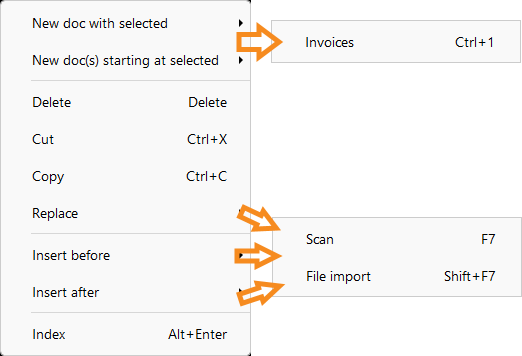
These pages contain one or many files.
Right clicking on the pages icon provides the following functionality:
> Submit button: clicking on this stores the files for later retrieval and viewing
Index Panel
Screen Elements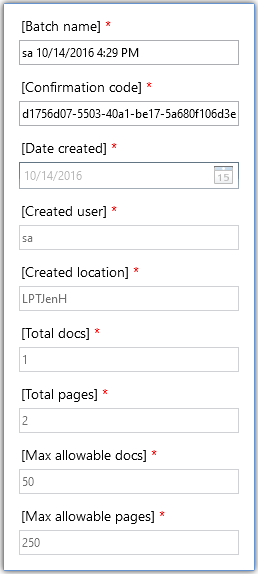
The elements for this screen are:
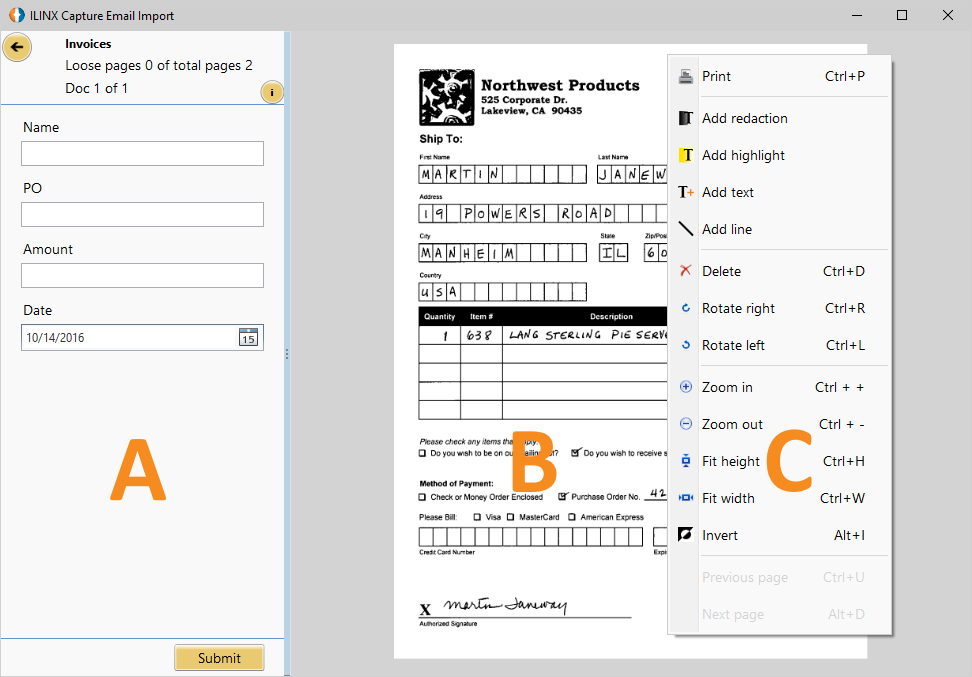
> Index field pane (see figure A) – provides entry of configured index fields to be applied to the document(s) for later retrieval and viewing.
> Display batch fields: (see screenshot to the right) – located at the top right of the pane – clicking on this link displays all batch level index values, clicking anywhere off of the pop-up screen, returns you to the main index screen.
Note: Locked and un-editable fields have a red asterisk after them
In this example the available indexes are:
> Invoice number: type in the invoice number of the document.
> Invoice date: click on the calendar button and select the appropriate date from the calendar provided or you may enter it manually.
> Back button: clicking on the back button takes you to the thumbnails panel.
> Submit button: clicking on this stores the files for later retrieval and viewing.
> Image viewing panel (see figure B) – displays the email in PDF format or an attached page if applicable and selected.
– The image viewer can view a large number of file types from inside the viewer, including PDF, TIFF, MS Word, Excel, etc. File types that cannot be viewed inside the viewer are launched in their native application, i.e., MS Project, Visio, etc.
– The image viewer also provides a number of common image tools like print, download, email highlight, add text, line, make a redaction, hide annotations, etc.
> Context menu (see figure C) – right-clicking on the image pane opens the context menu, which provides options for viewing / manipulating the imported page.
